Video to Blog AI Review: Transform Your Videos into Engaging Blog Posts
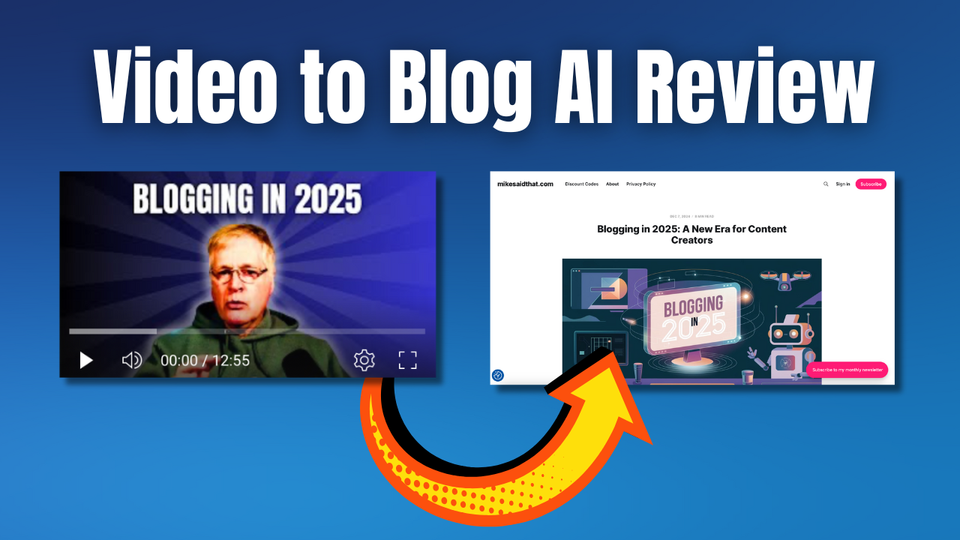
In this Video to Blog AI Review, discover how to effortlessly convert your YouTube videos into high-quality blog posts. This powerful tool not only saves you time but also enhances your content strategy by allowing you to repurpose your existing video content effectively.
Introduction to Video to Blog
If you're creating content on YouTube but aren't leveraging it through a blog, you're missing out on a fantastic opportunity. Video to Blog is a tool designed to convert your videos into engaging blog posts effortlessly. With this tool, you can take your existing video content and transform it into written articles that can attract more traffic and engage your audience in a different way.
Ready to easily turn YouTube videos into blog posts?
Get Video to Blog today! (affiliate link)
The beauty of using Video to Blog lies in its simplicity and effectiveness. Not only does it save you time, but it also allows you to reach a broader audience who may prefer reading over watching videos. This is especially important since not everyone has the time or inclination to watch videos, but many people love to read. By converting your videos into blog posts, you're essentially doubling your content's reach!
Why You Need a Blog for Your YouTube Channel
Having a blog for your YouTube channel opens up a plethora of benefits. Here are just a few reasons why you should consider starting one:
- Increased Visibility: Blogs can help improve your SEO, making it easier for people to find your content through search engines.
- Engagement Opportunities: A blog allows you to engage with your audience through comments and discussions, fostering a community around your content.
- Content Repurposing: You can repurpose your video content into written form, providing value in multiple formats.
- Monetization Options: Blogs can open up additional revenue streams through affiliate marketing, sponsored posts, or ad placements.
- Control Over Content: Unlike social media platforms, having a blog gives you complete control over your content and its presentation.
Exploring the Video to Blog Interface
When you first log into the Video to Blog interface, you’ll be greeted with a clean and user-friendly layout. The dashboard is intuitive and makes it easy to navigate through your options. You can see a list of your videos and the blog posts that have been created from them.
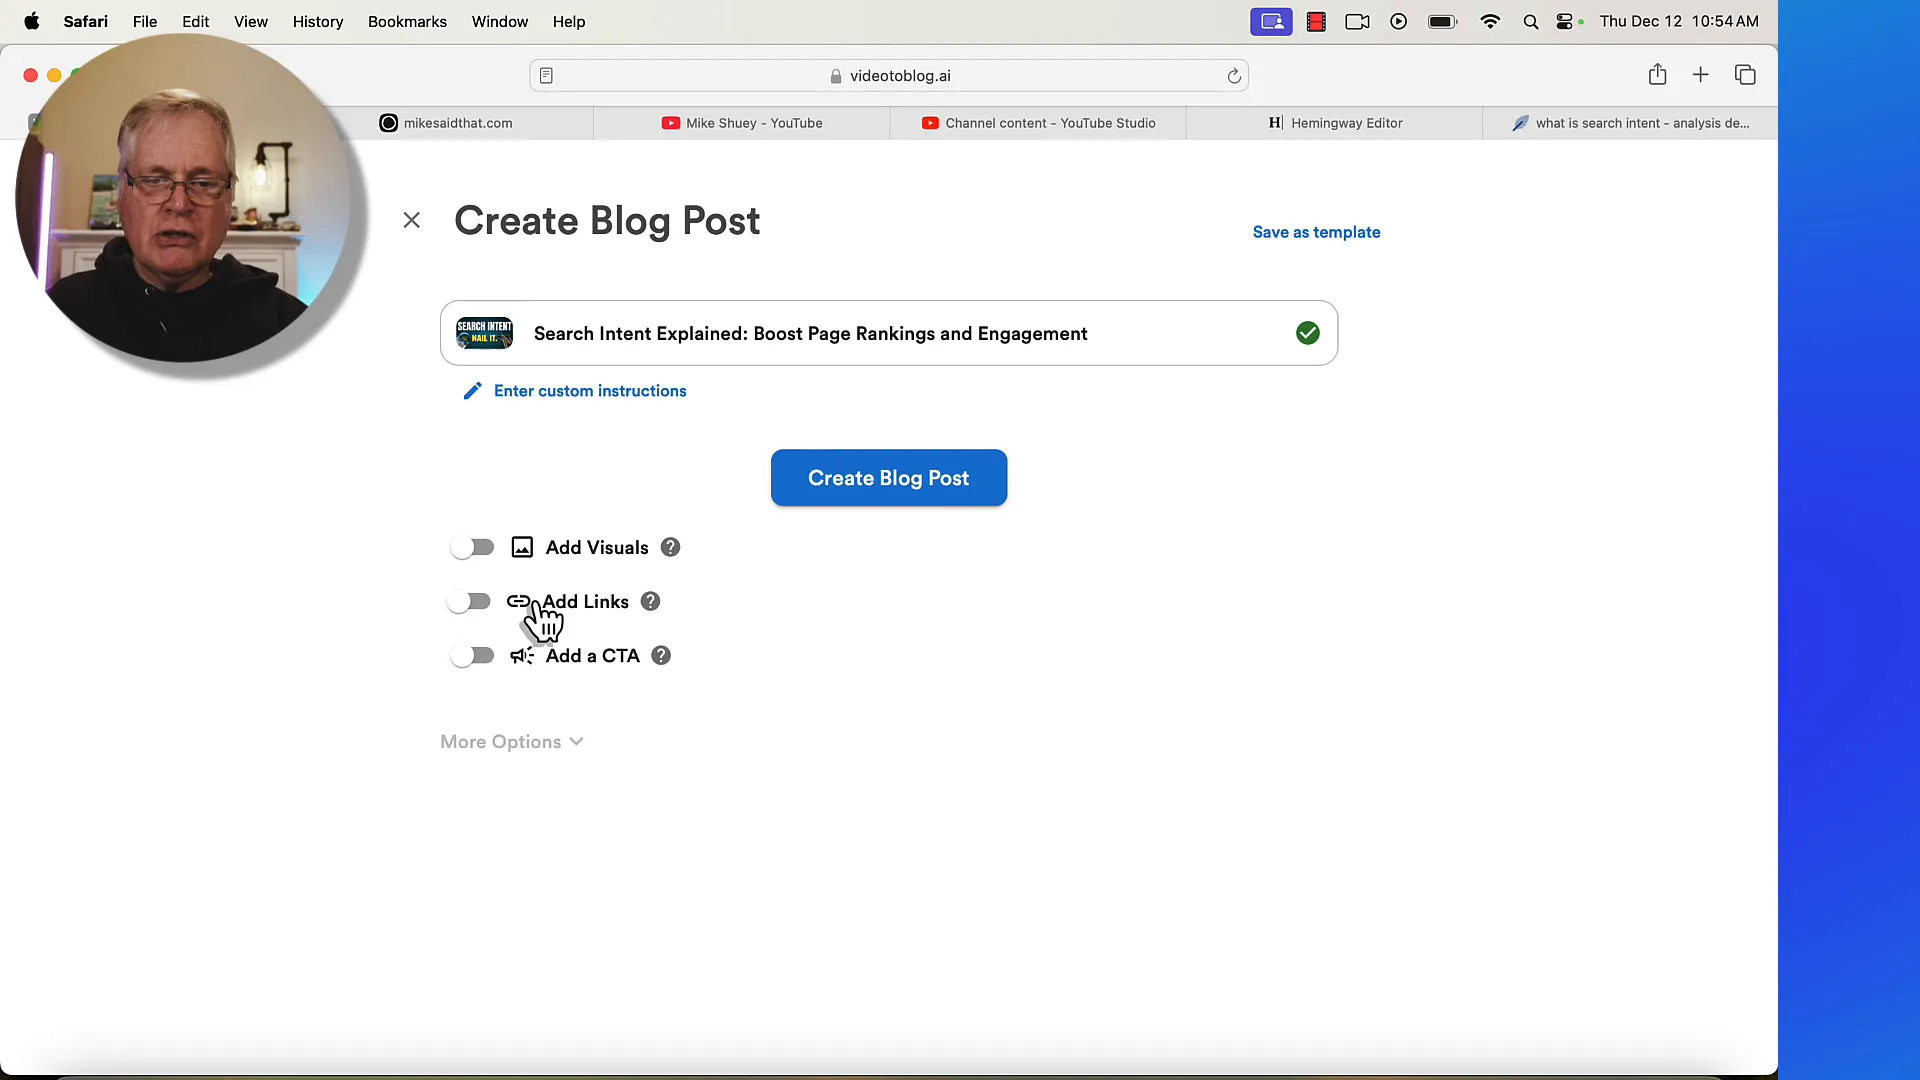
The first thing you’ll notice is the option to input your video link. Simply copy and paste your YouTube video URL, and the tool will automatically fetch the video details and prepare to create a blog post. This feature alone saves a ton of time!
Creating Your First Blog Post
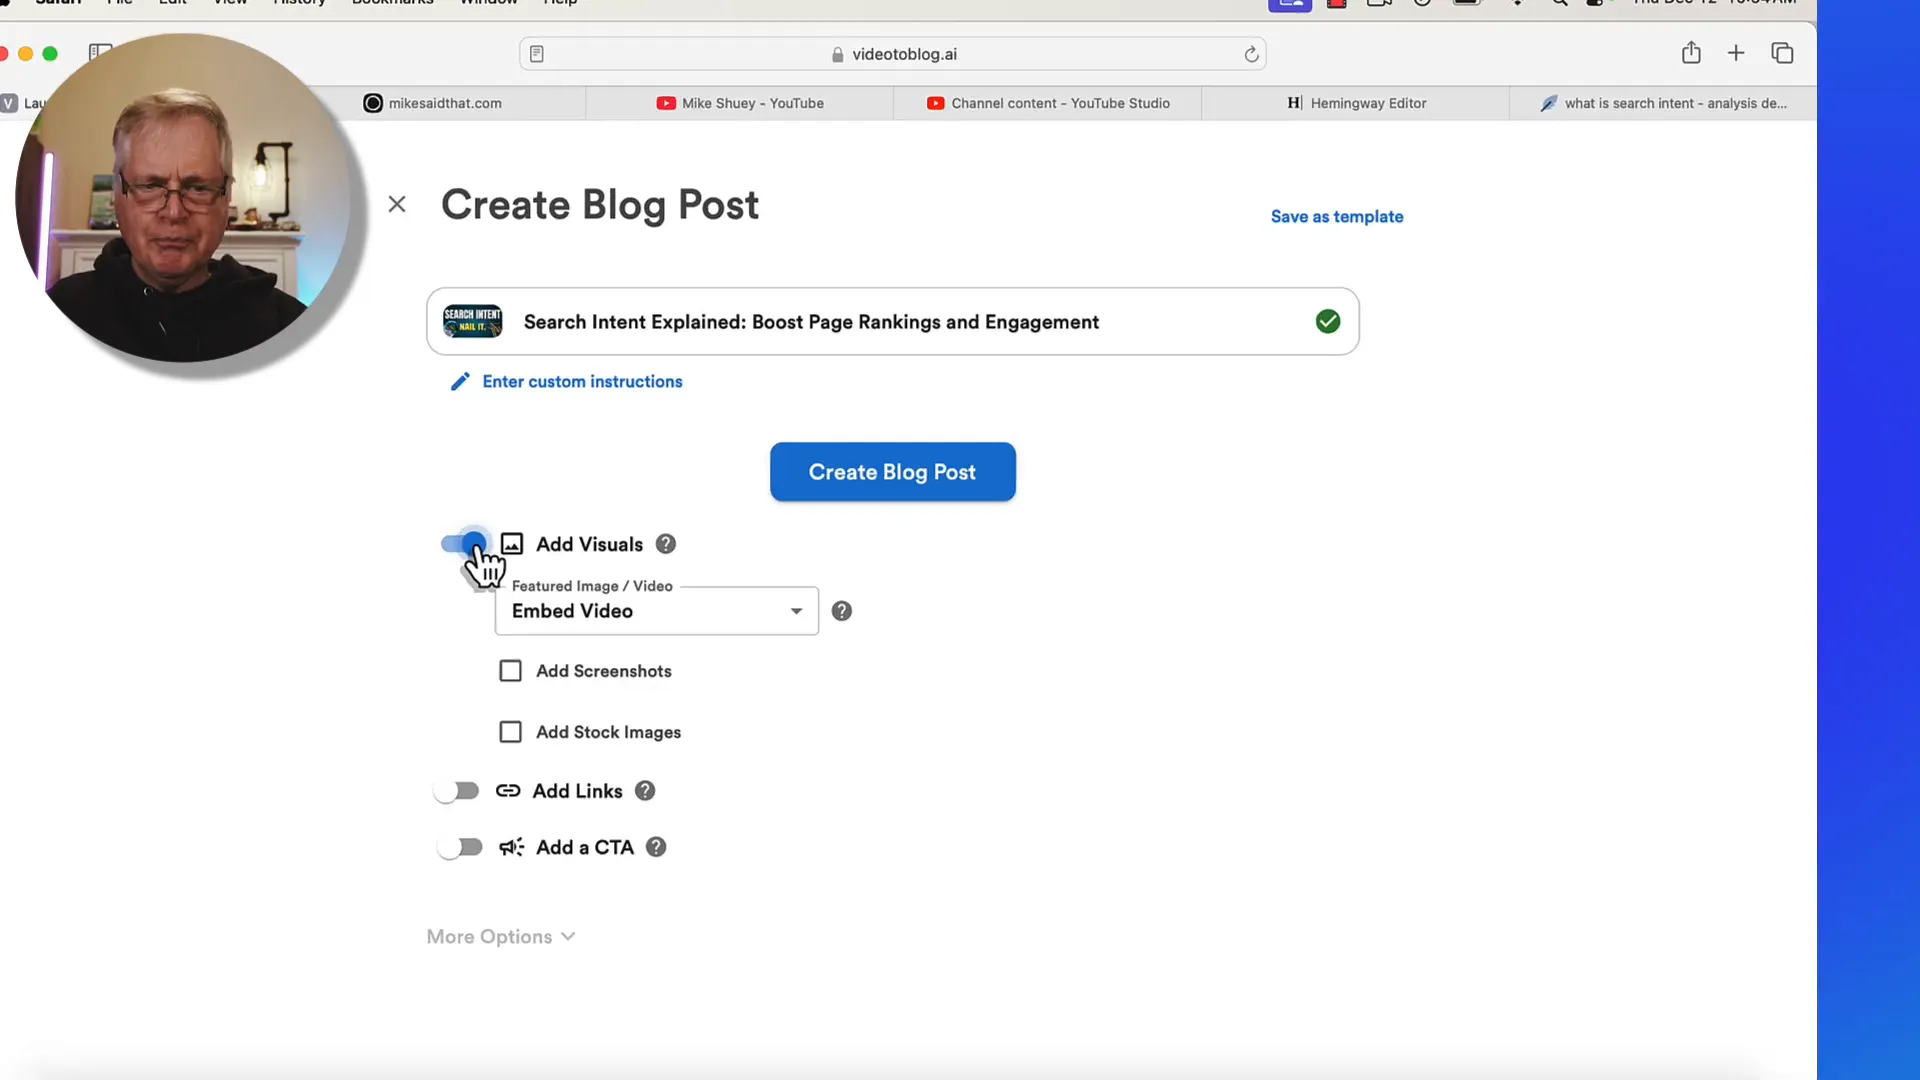
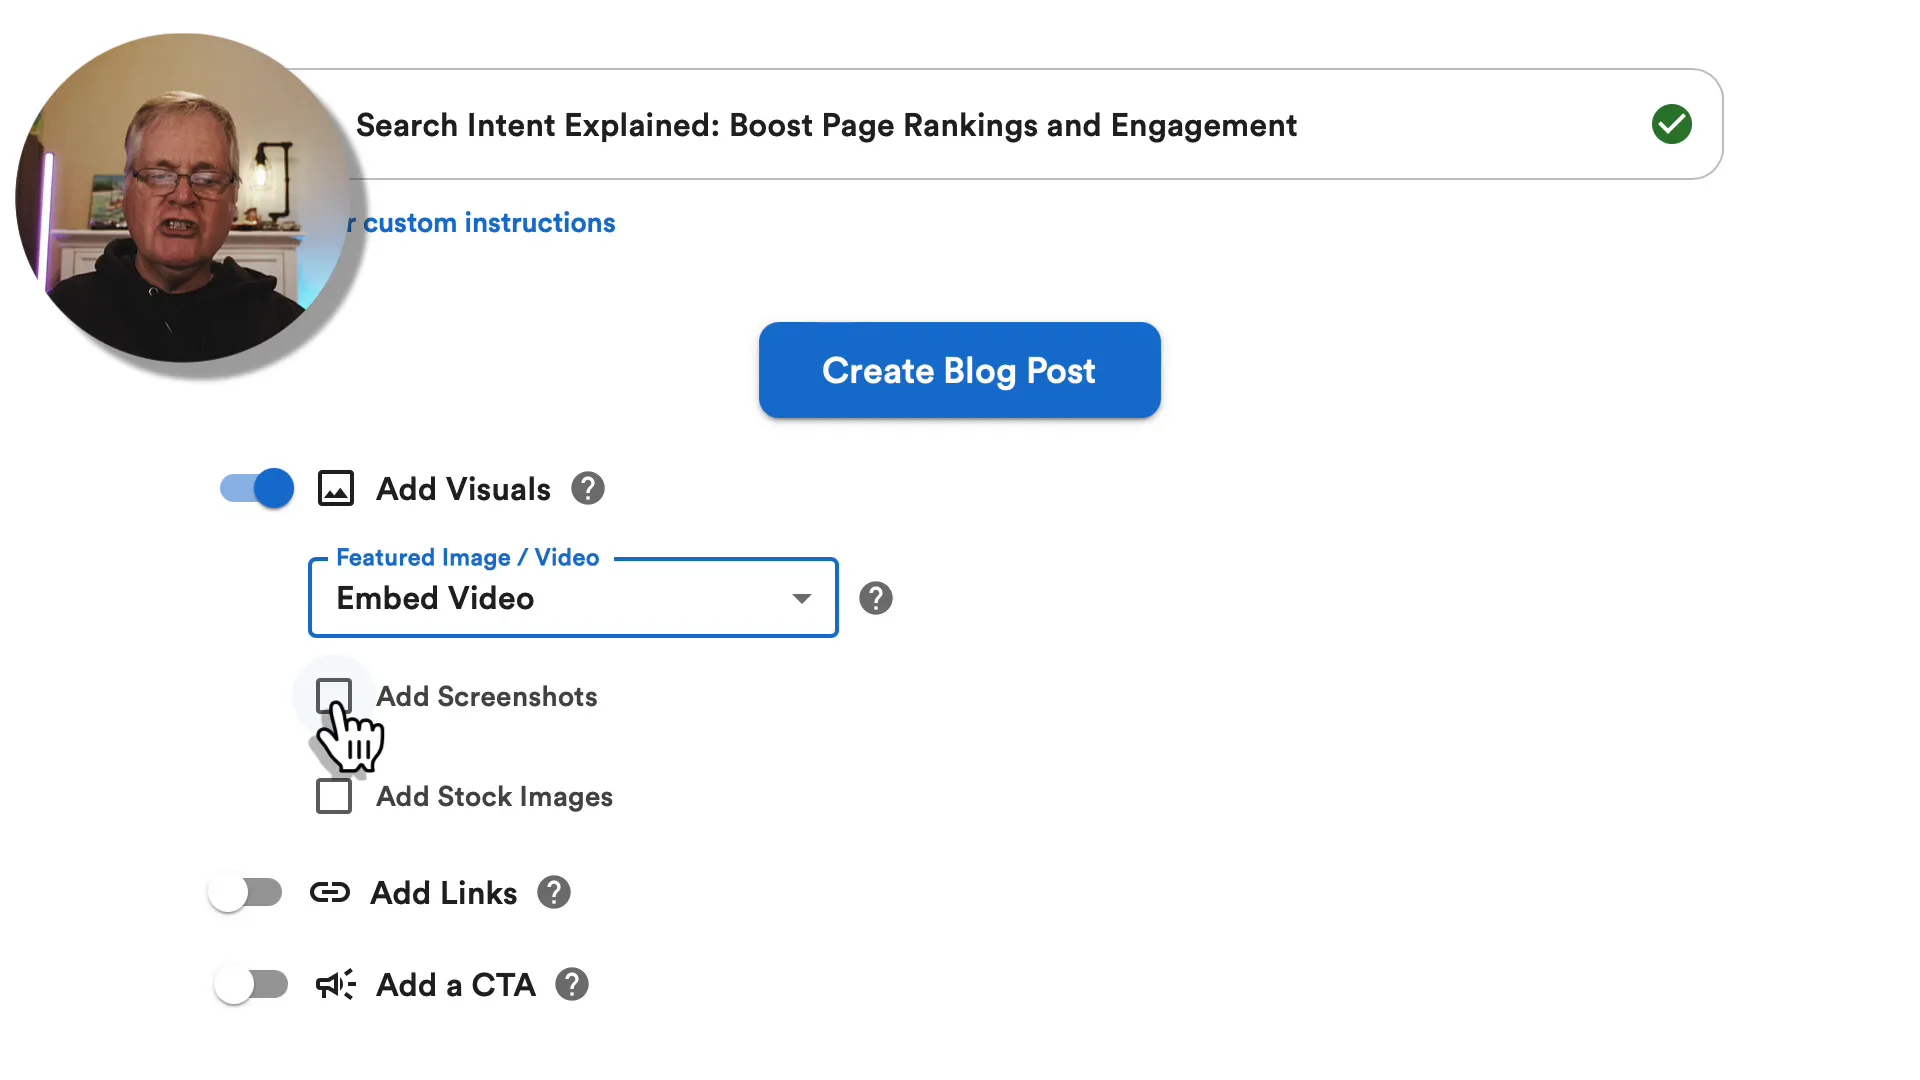
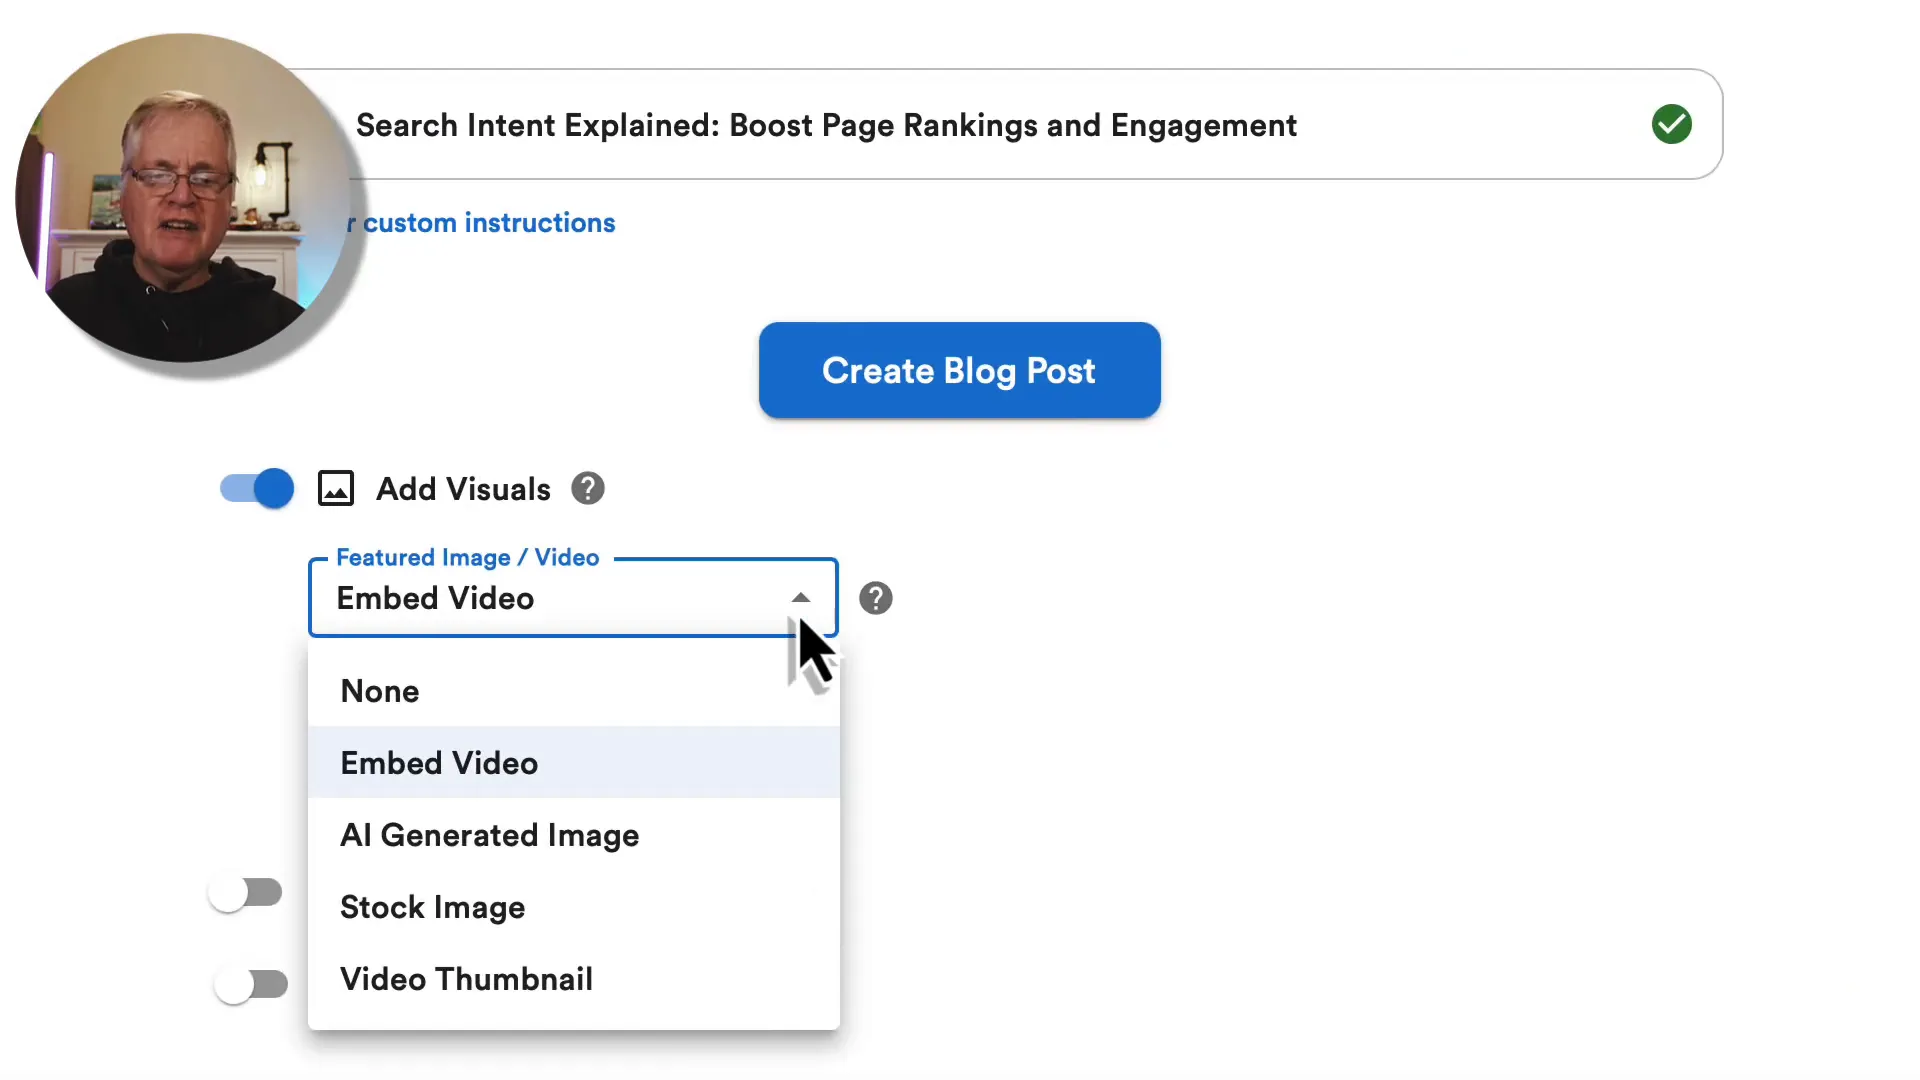
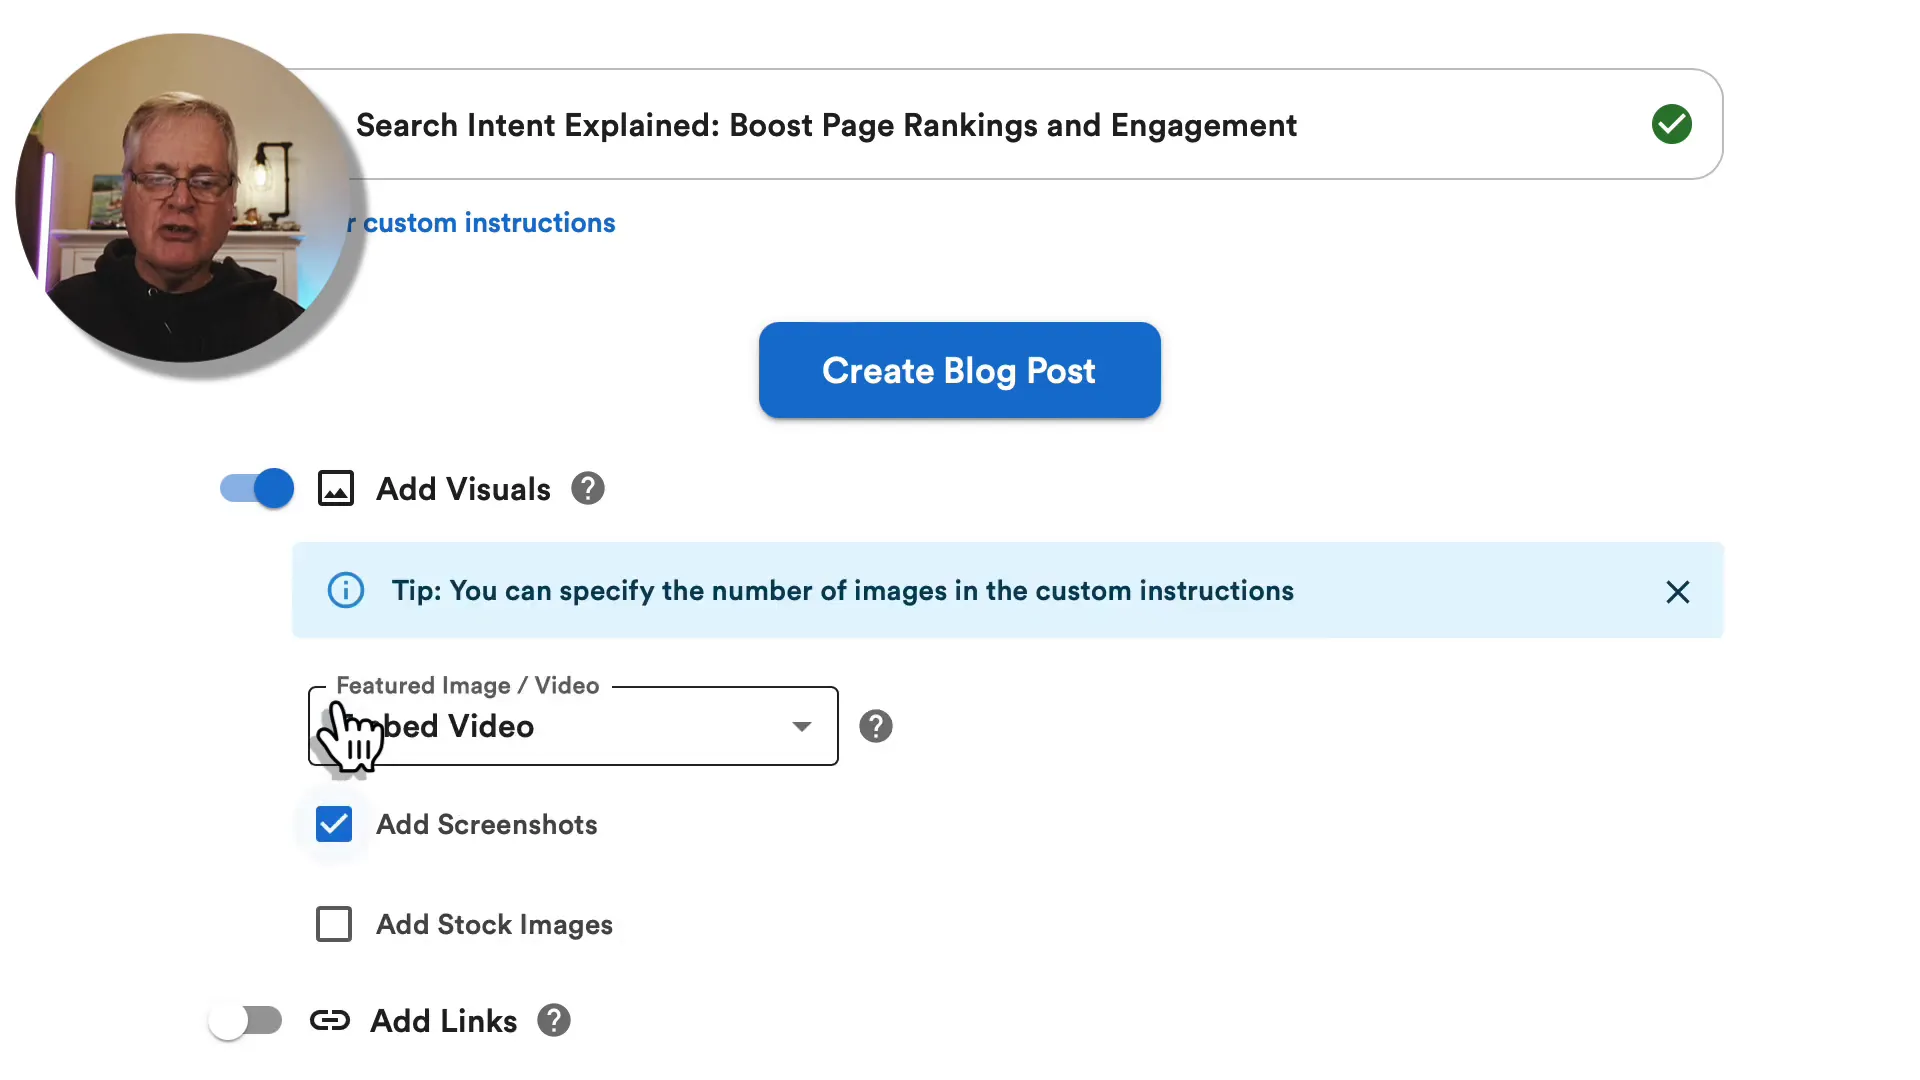
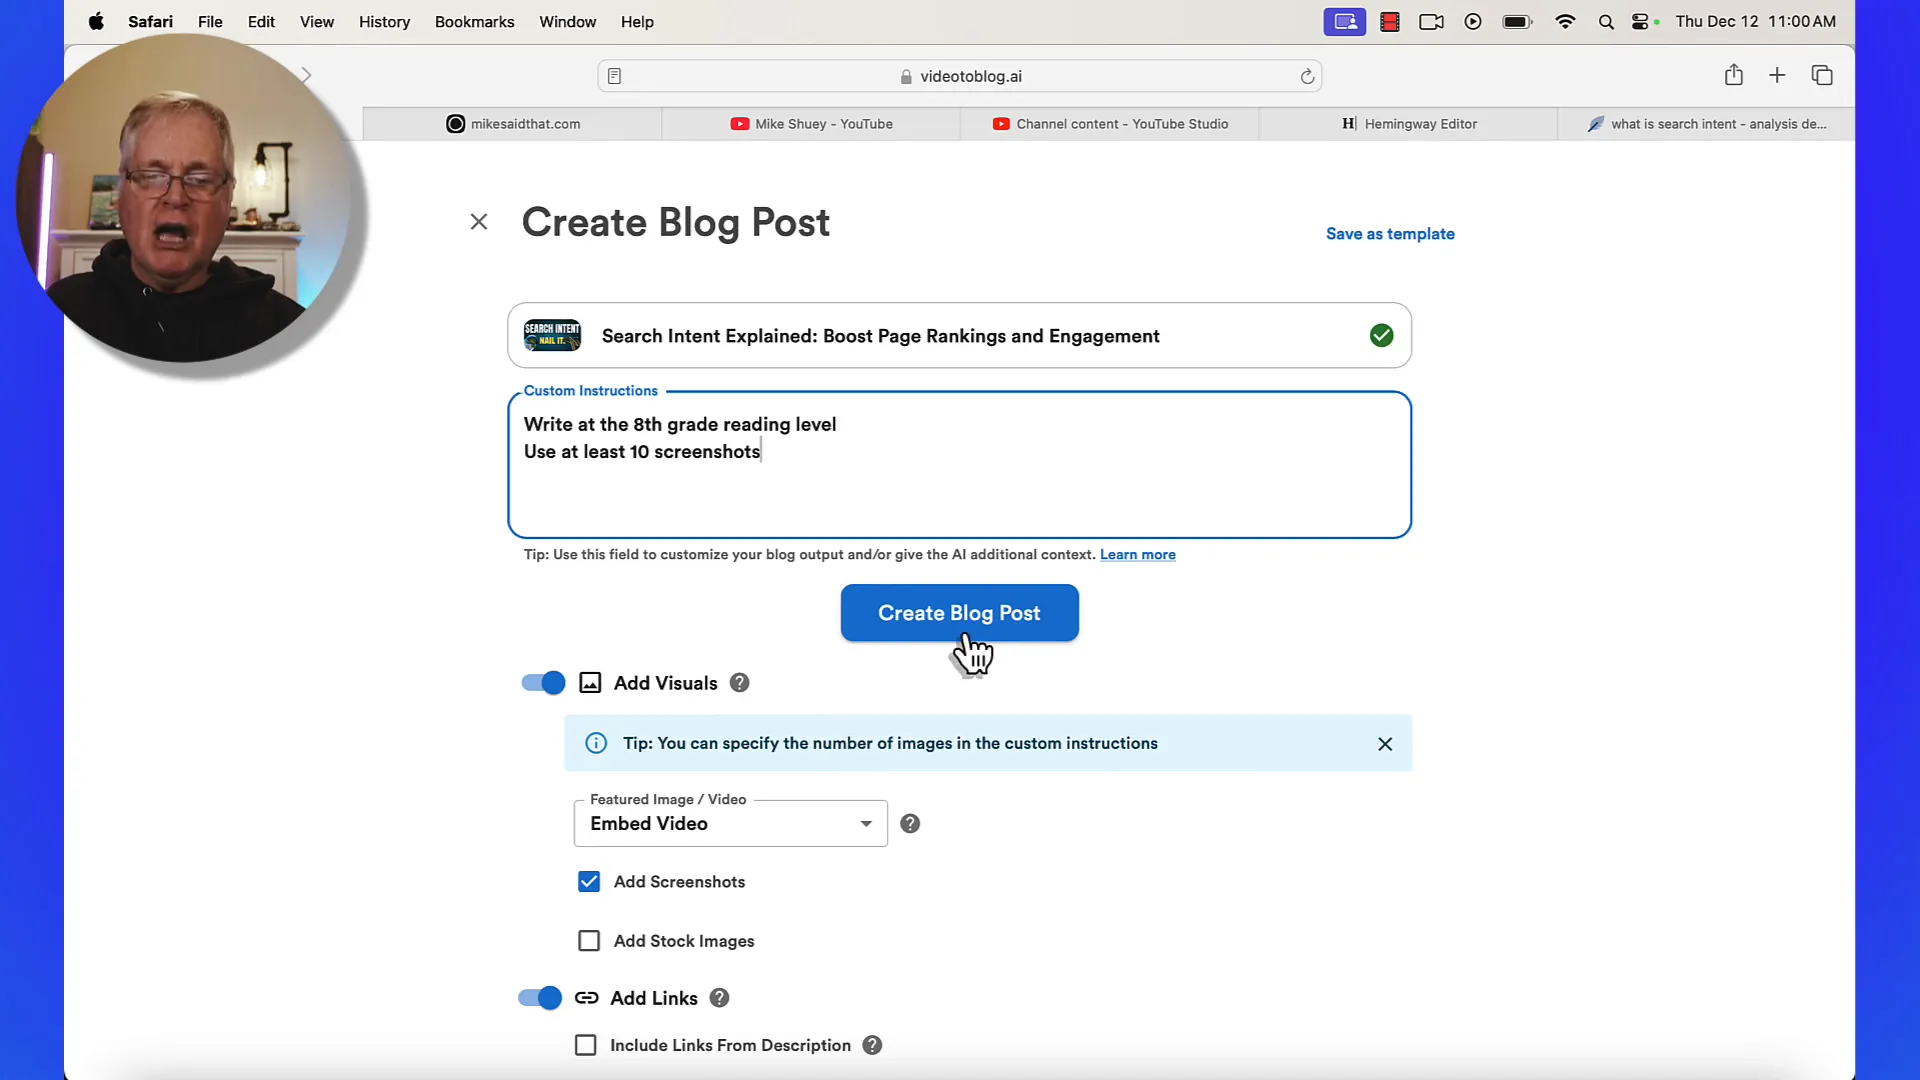
Once you’ve entered your video link, the next step is to customize your blog post settings. You can choose to embed the video directly in the post, which is a fantastic way to keep your audience engaged. I always opt for this option, as it allows readers to watch the video without leaving the blog page.
Additionally, you can select options to include screenshots from the video. This is a game-changer for tutorial content, as it visually guides readers through the material. The tool makes it easy to decide which visuals to include, ensuring your blog post is not just text-heavy but visually appealing as well.
Choosing Visual Elements
Visual elements are crucial in engaging your readers. The Video to Blog tool allows you to add screenshots from the video, which can complement the written content. You can select the most relevant screenshots that illustrate key points discussed in the video.
When selecting visuals, make sure they are relevant and add value to your content. This not only helps keep your readers interested but also enhances their understanding of the topic. It's all about making your blog post more engaging and informative!
Adding Links to Your Blog Post
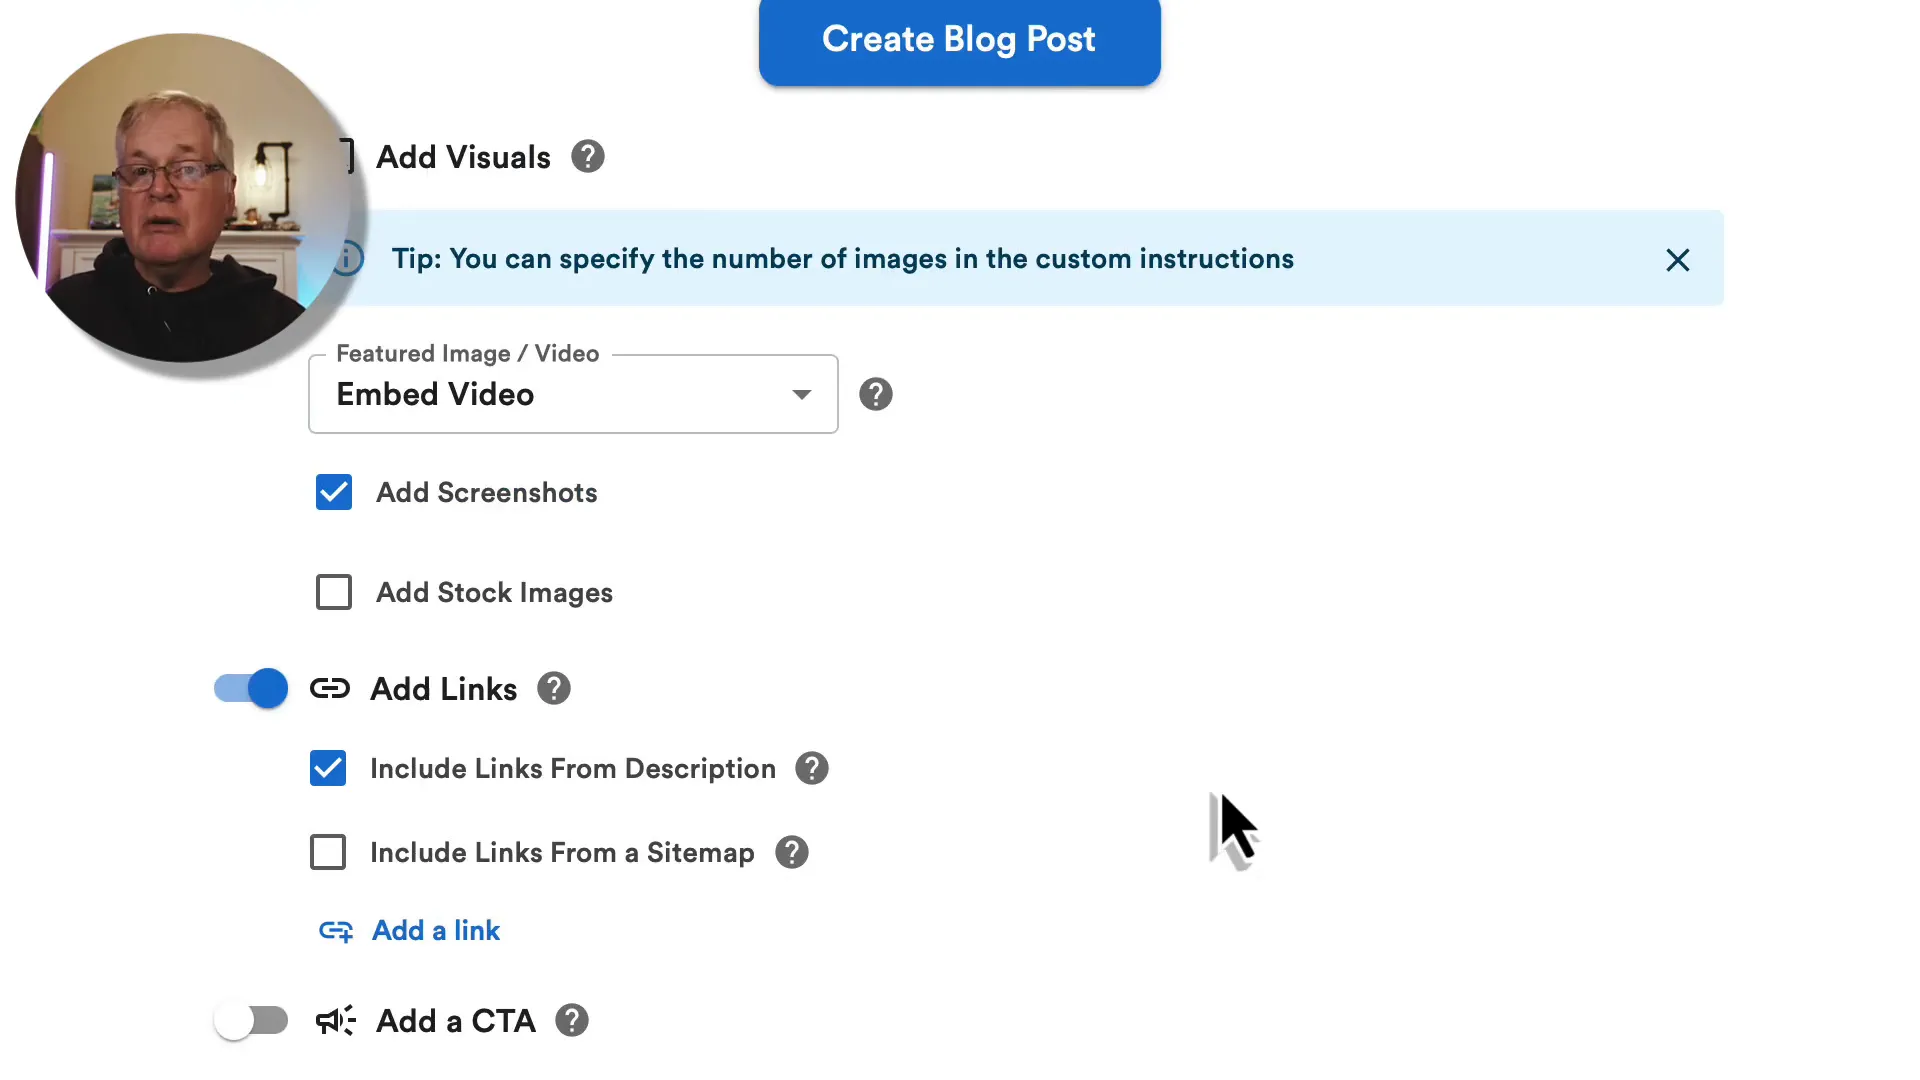
Another fantastic feature of Video to Blog is the ability to add links within your blog post. This can include links to your other blog posts, affiliate products, or any other relevant resources. Internal linking is essential for SEO and helps keep readers on your site longer.
When adding links, think about the value they bring to your readers. For instance, if your video discusses a specific product, linking to a detailed blog post about that product can provide additional insights and information. This not only enhances the reader's experience but also helps you build authority in your niche.
Incorporating Calls to Action
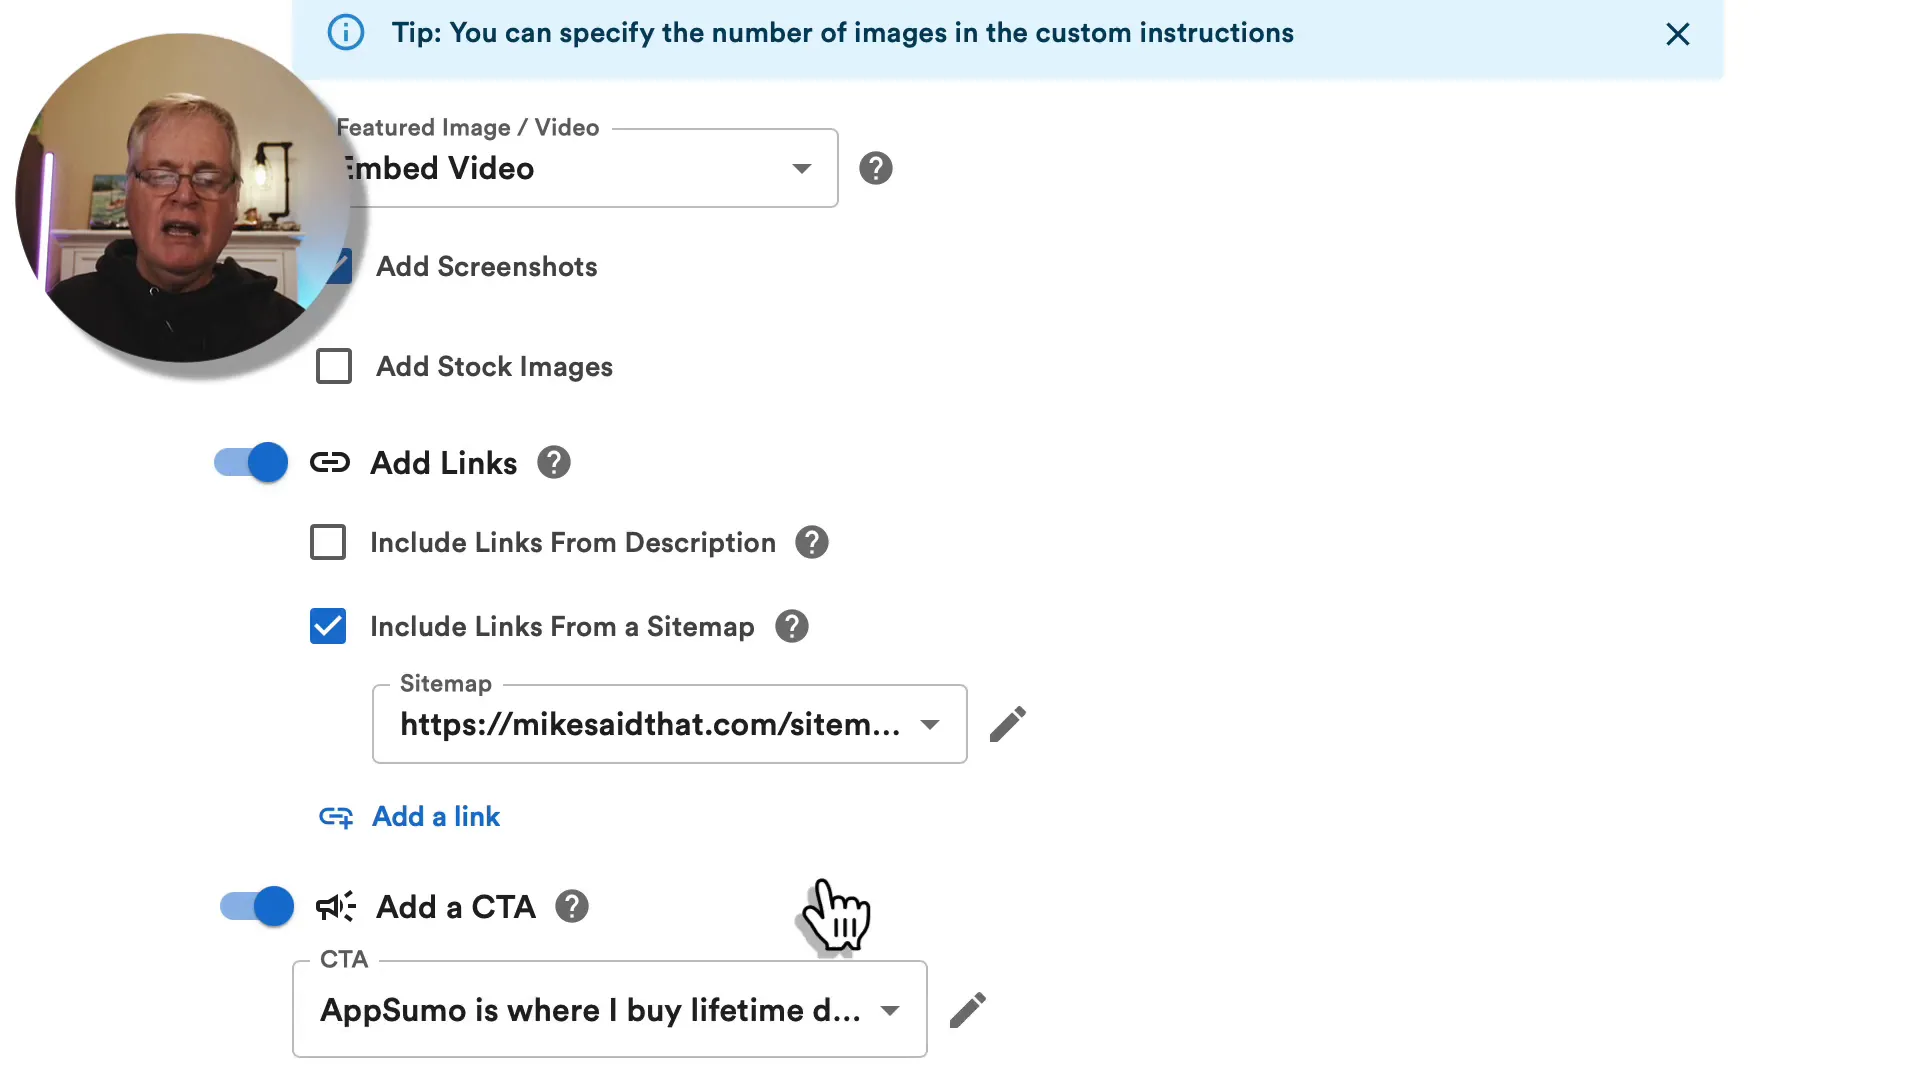
One of the best ways to engage your audience is by incorporating calls to action (CTAs) in your blog posts. CTAs encourage readers to take a specific action after consuming your content. Whether it’s subscribing to your newsletter, checking out a product, or watching another video, a well-placed CTA can significantly boost engagement.
When using Video to Blog AI, you have the option to add a CTA directly into your blog post. This feature allows you to create a consistent message across your content. For example, I often use a CTA related to lifetime deal software, which aligns with my audience's interests.
Types of CTAs to Consider
- Newsletter Sign-Up: Encourage readers to subscribe for updates and exclusive content.
- Product Recommendations: Link to products you mention in your blog for easy access.
- Social Media Engagement: Invite readers to follow you on social platforms for more insights.
- Related Content: Direct readers to other blog posts or videos that expand on the topic.
Understanding More Options
As you dive deeper into the Video to Blog tool, you'll find a variety of options that can enhance your blog post. It's important to explore these features to maximize the effectiveness of your content.
For instance, you can choose to embed your video directly in the blog post or use a thumbnail. Embedding the video keeps readers engaged and provides them with a seamless experience right from your blog. I always prefer the embedded option, as it allows viewers to watch the video without leaving the page.
Choosing the Right Settings
Another crucial aspect is selecting whether to add screenshots or stock images. For tutorial content, adding screenshots can significantly enhance the reader's experience by providing visual cues. However, you must choose one or the other, so think about your content type before making a decision.
Selecting Transcription and Tone of Voice
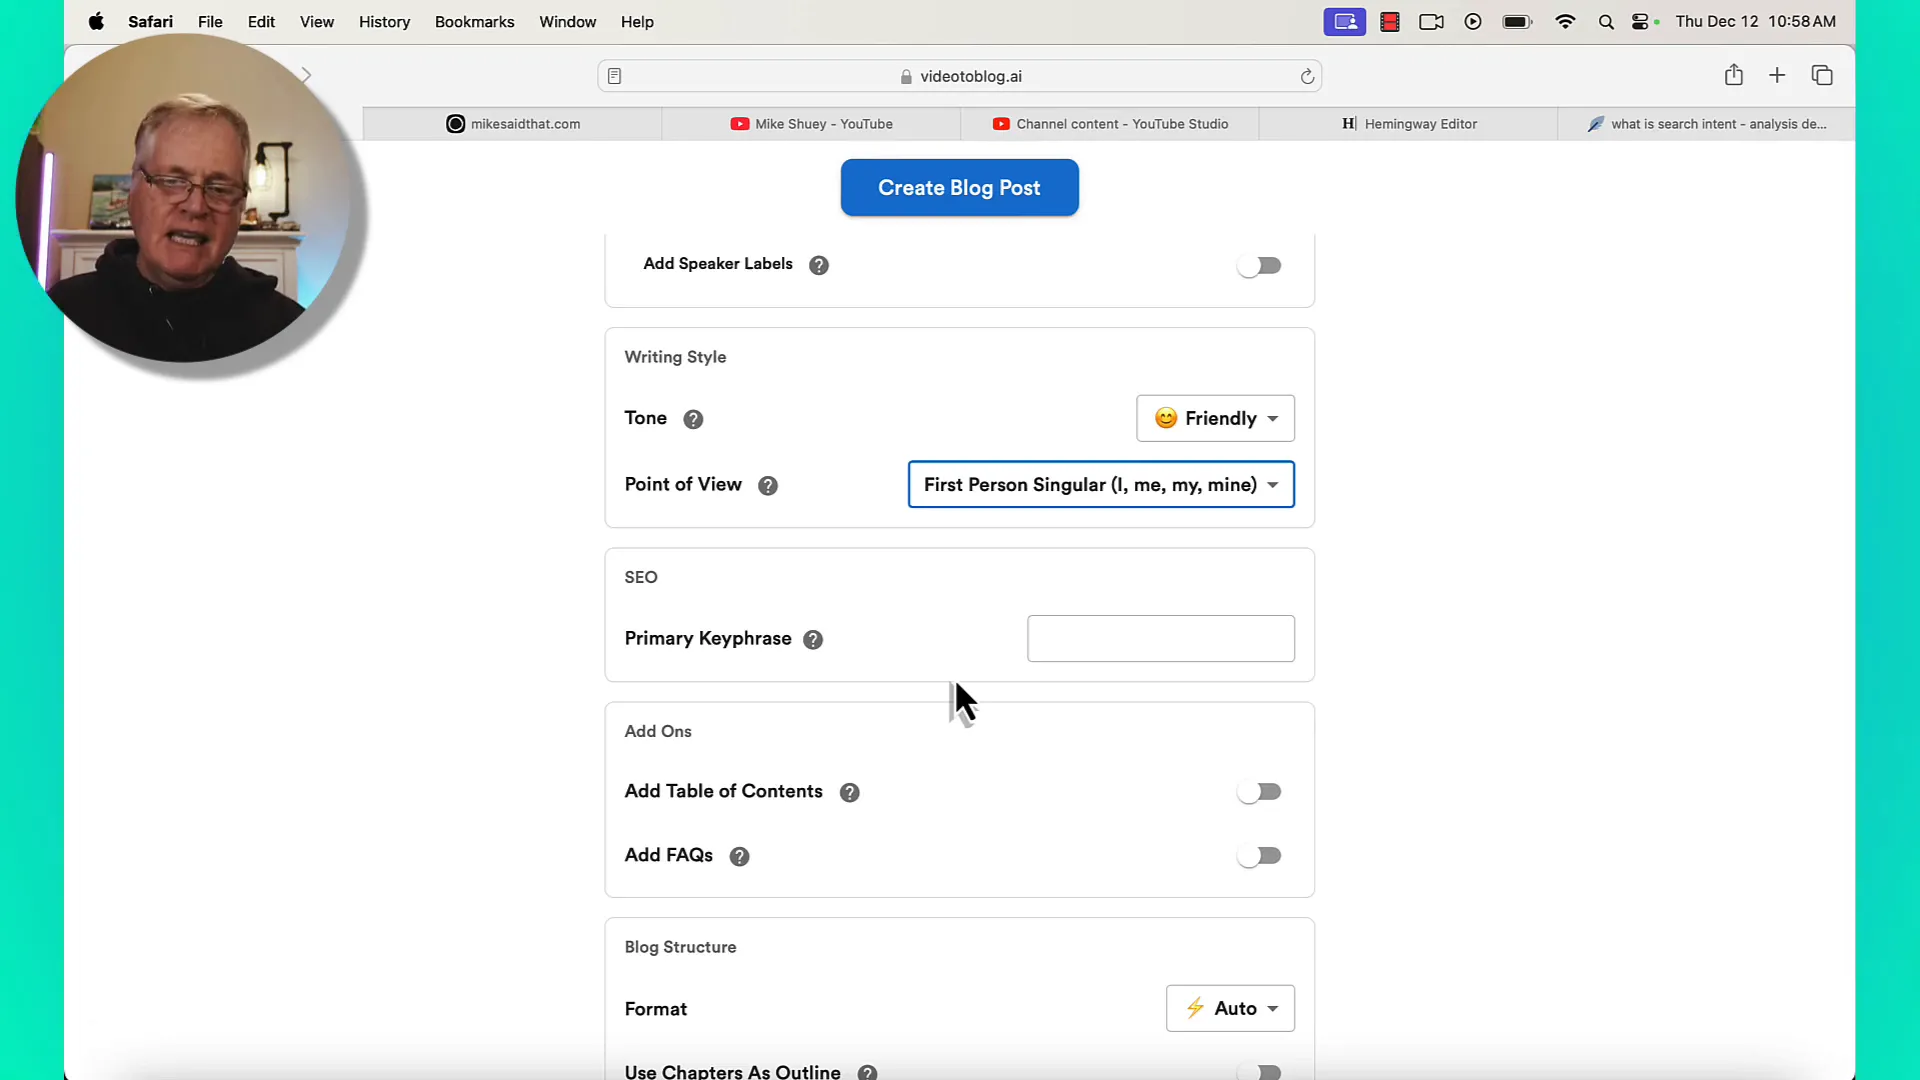
The tone of voice in your blog post is vital for connecting with your audience. Video to Blog allows you to select a tone that matches your style—whether it's friendly, casual, or professional. I usually opt for a friendly tone, as it resonates well with my readers.
Transcription Quality Matters
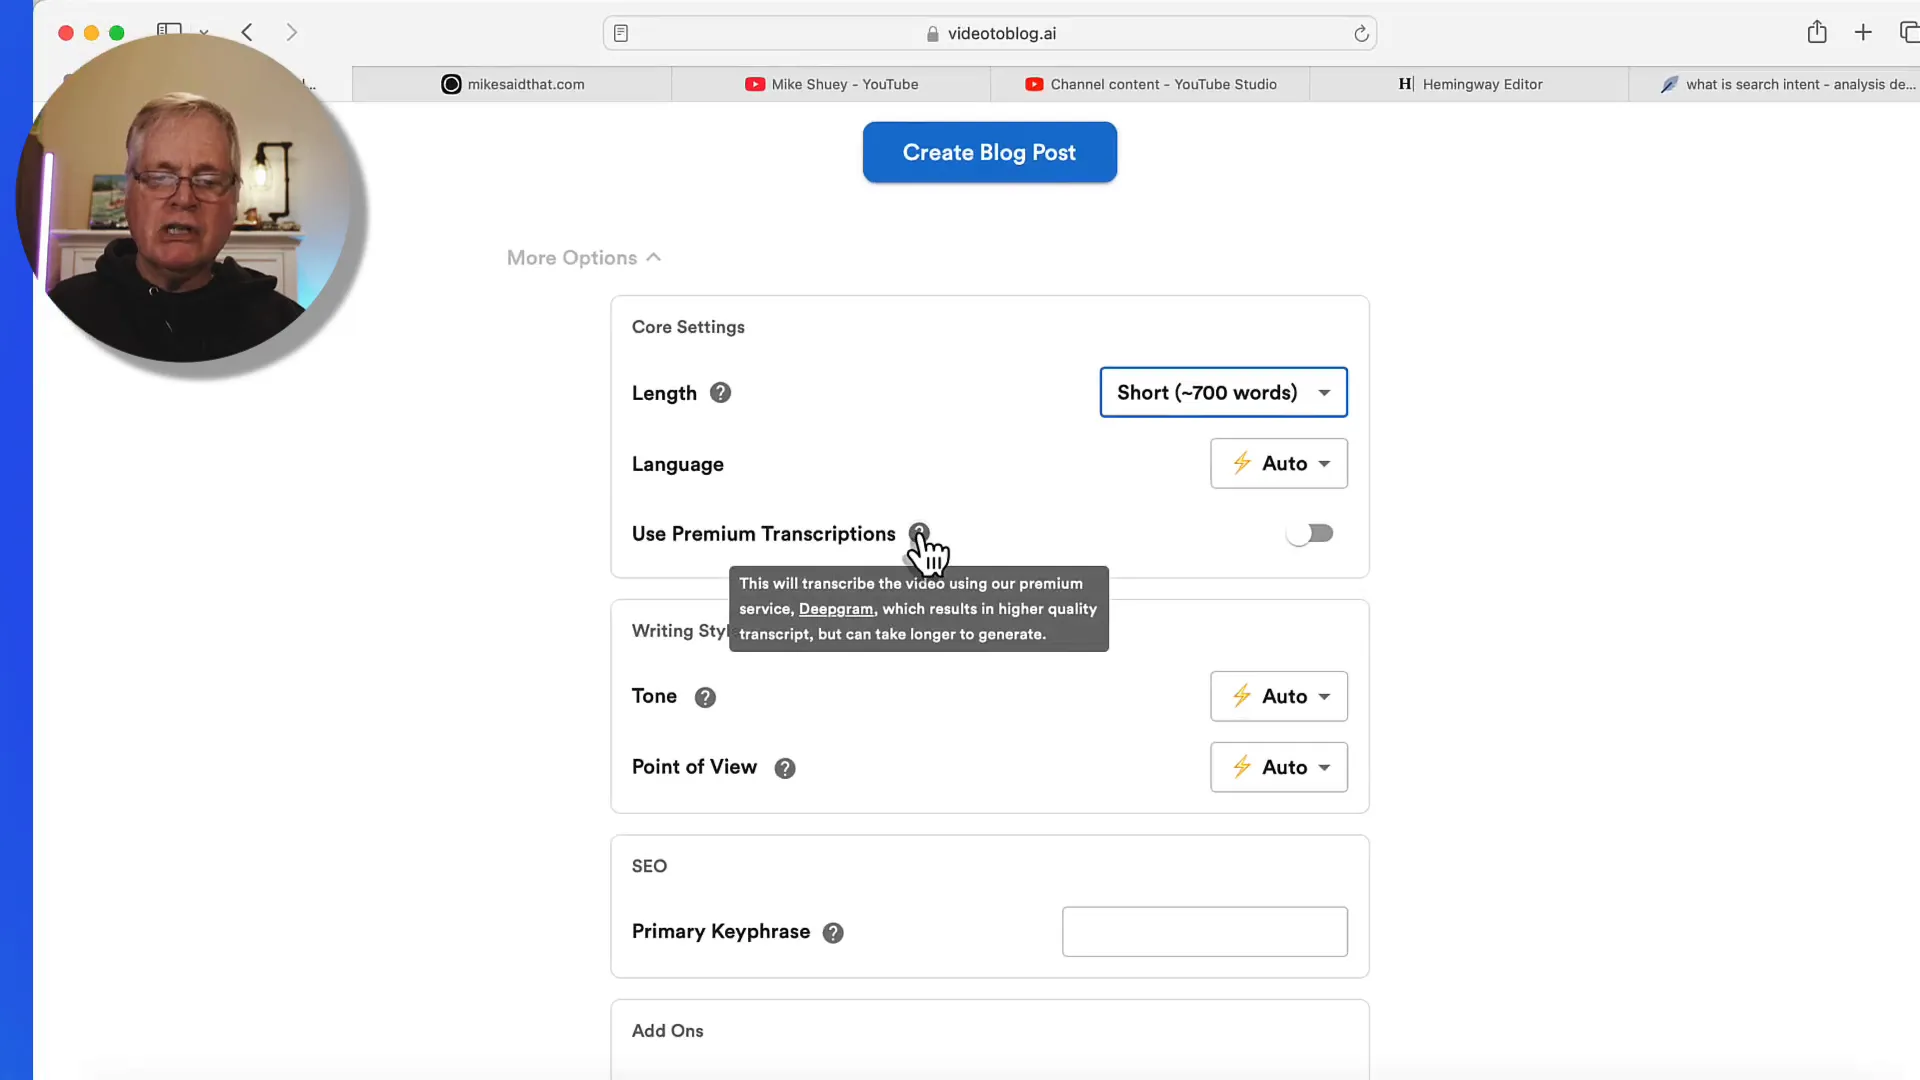
When creating a blog post, the quality of the transcription is key. Video to Blog offers a premium transcription option called Deepgram, which ensures that the transcript is accurate and detailed. This accuracy is crucial because the AI uses the transcript to generate the blog content.
Always select the premium transcription option if you want the best possible outcome. It may take a little longer, but the quality of the final blog post is worth it.
Finalizing Your Blog Structure
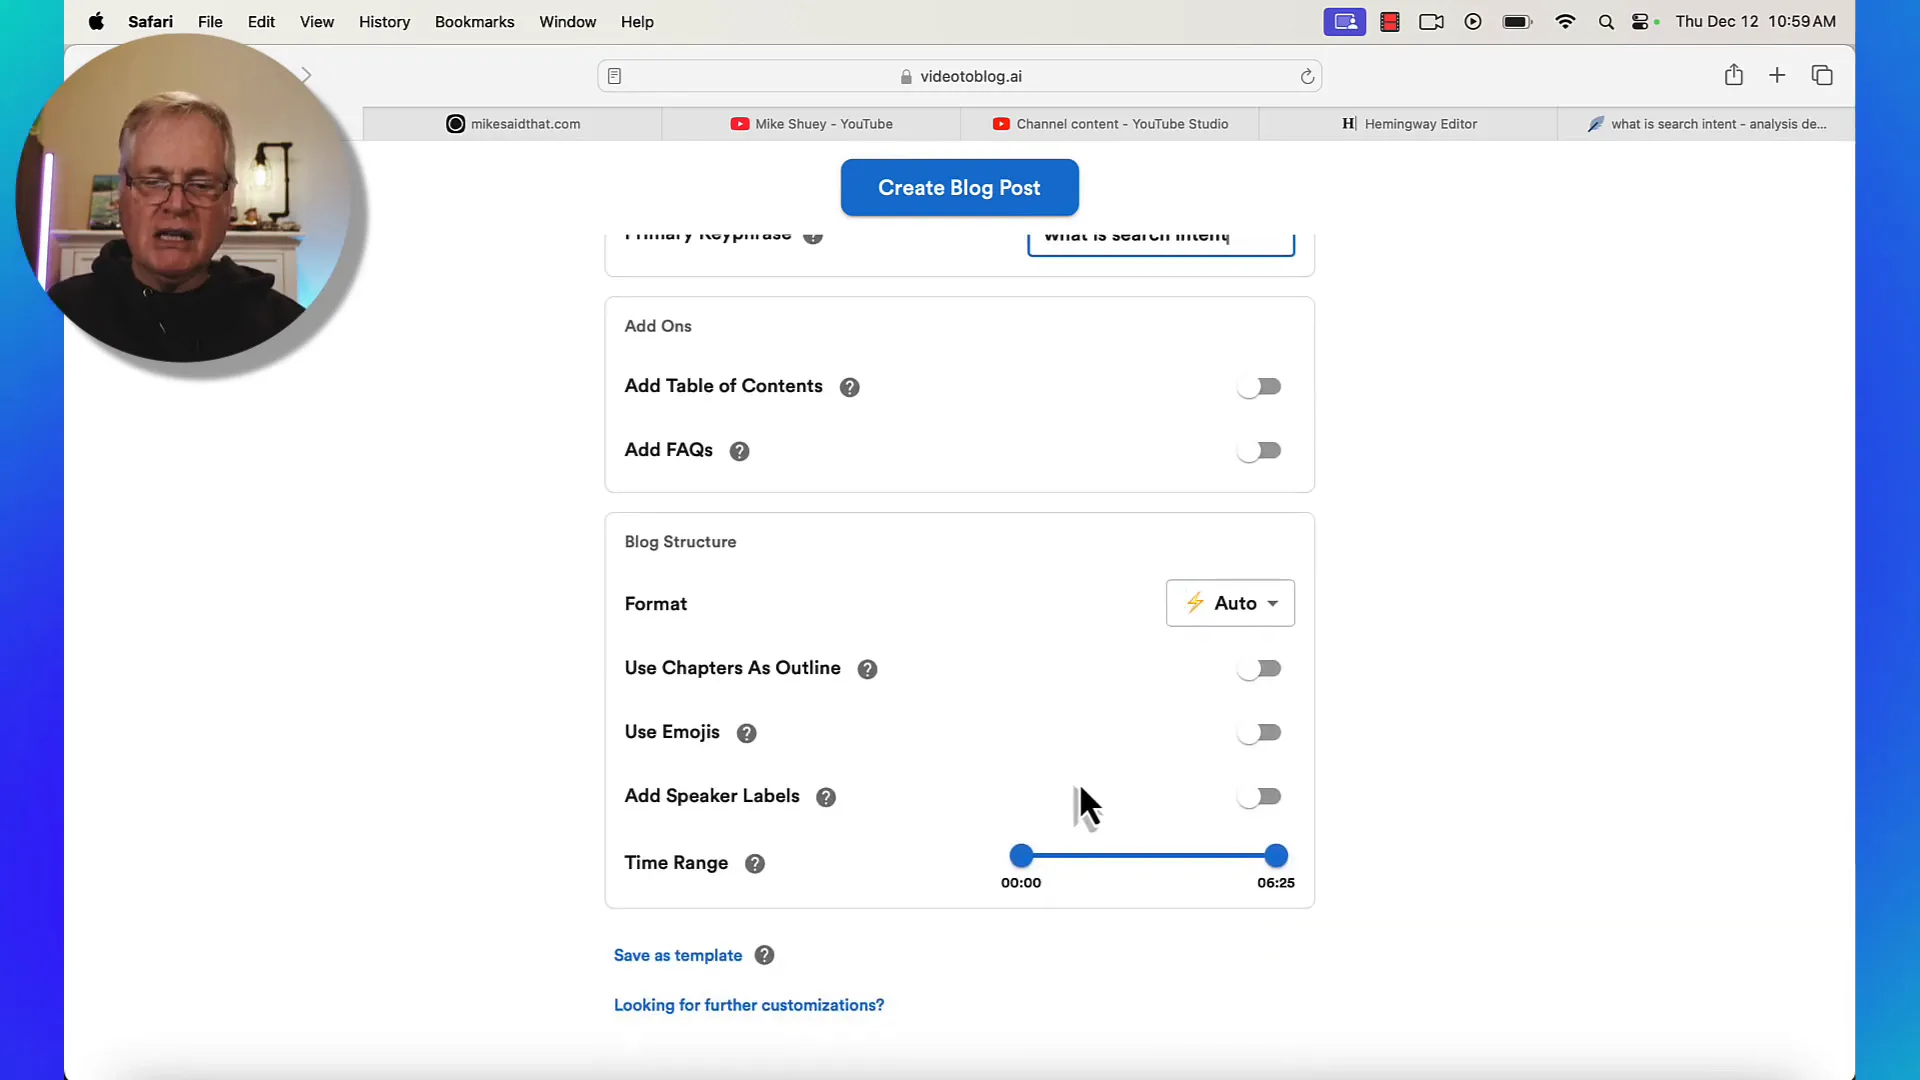
Once you've set your options, it's time to finalize the structure of your blog post. You can choose to add a primary key phrase to help with SEO, which is essential for getting your content discovered online. For example, if your video is about search intent, make sure to include that as your primary key phrase.
Additional Features to Consider
- Custom Instructions: You can provide specific instructions for the AI to follow, ensuring the content aligns with your vision.
- Templates: If you find yourself using the same settings repeatedly, save them as a template to streamline the process for future posts.
- SEO Metadata: The tool generates SEO metadata, but you can customize it for better optimization.
Generating the Blog Post
After all your settings are in place, it’s time to generate your blog post. Clicking the create button will initiate the transcription and content generation process. Depending on the length of the video, it may take a few minutes, but the output is generally impressive.
Reviewing the Generated Content
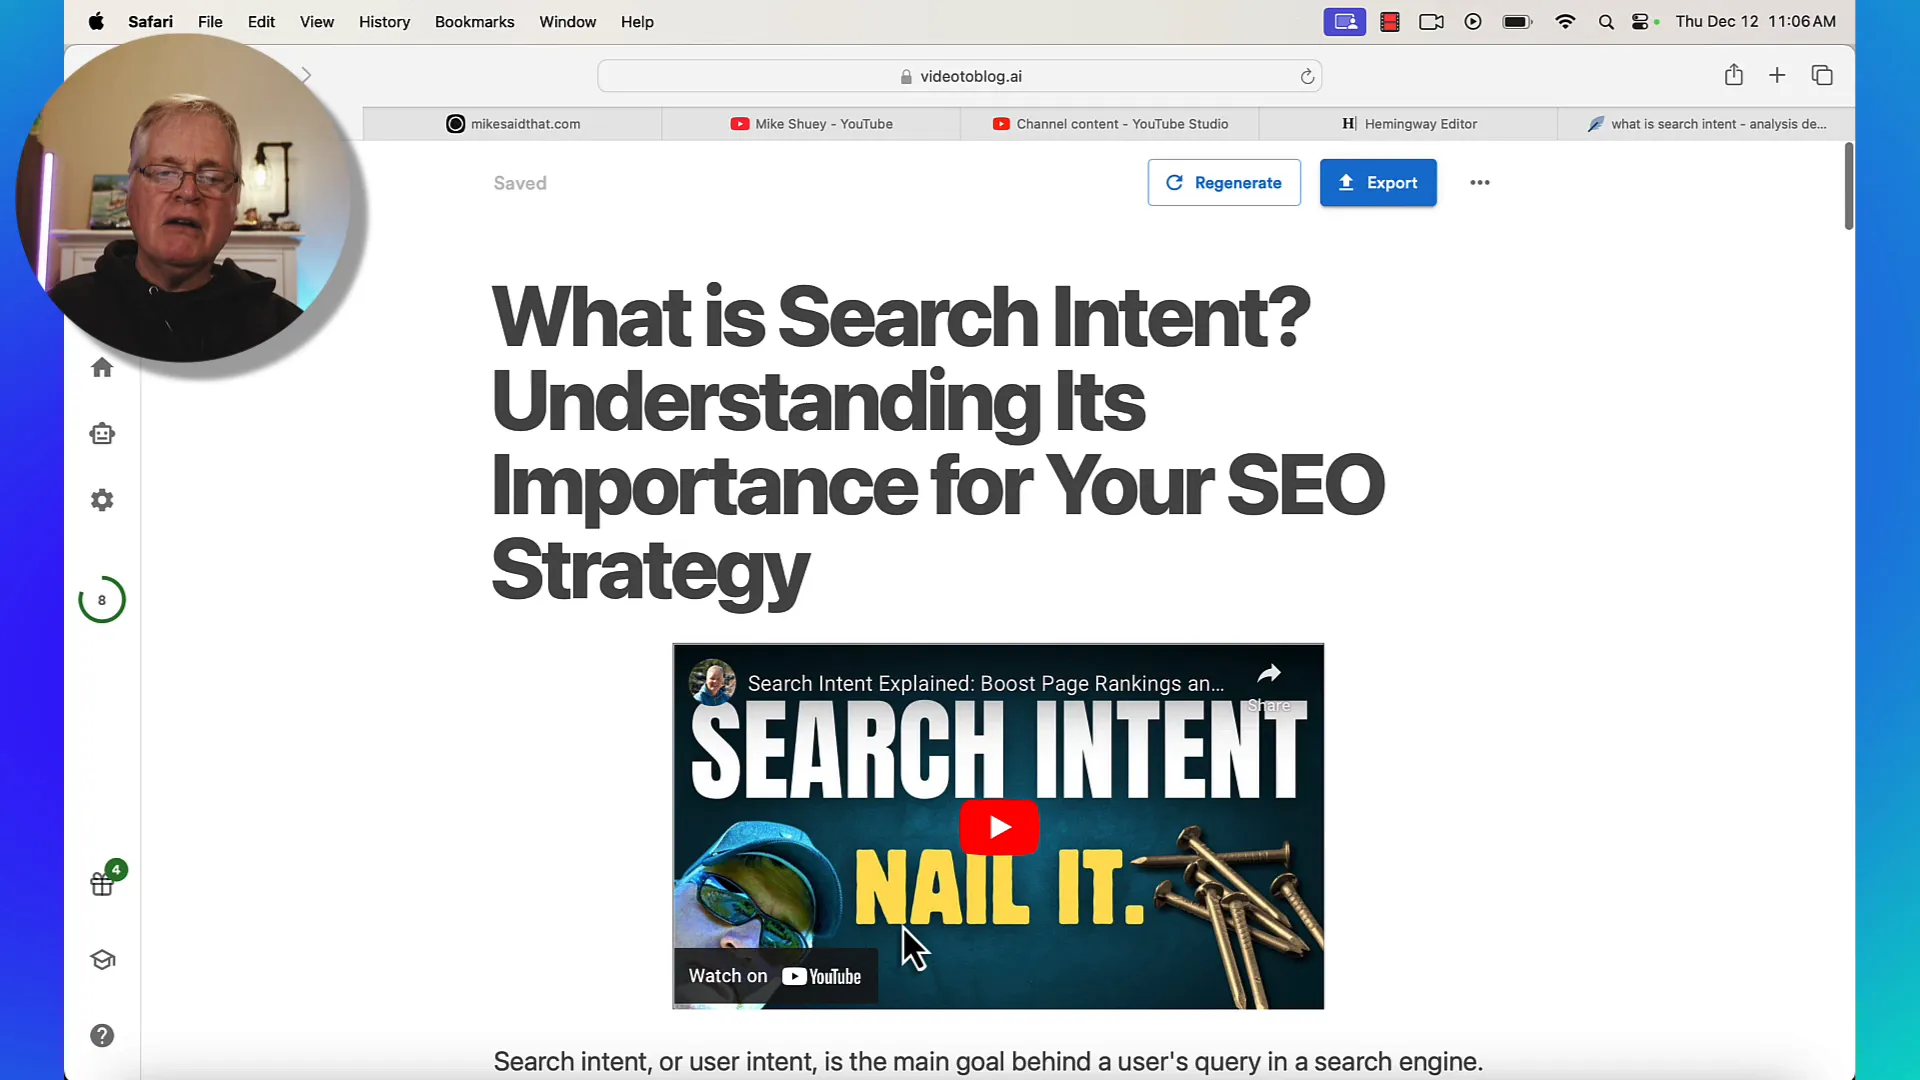
Once the blog post is generated, take the time to review it thoroughly. Ensure that all the images are appropriately placed next to the relevant text. Sometimes, the AI might not get the context right, and you’ll want to make adjustments as needed.
Editing and Fine-Tuning Your Content
Editing is a crucial step in the blogging process. Even though the AI does a great job, it's essential to read through the content to ensure it’s factually accurate and flows well. Look out for any long paragraphs or complex sentences that may need breaking down for readability.
Using Content Analyzer Tools
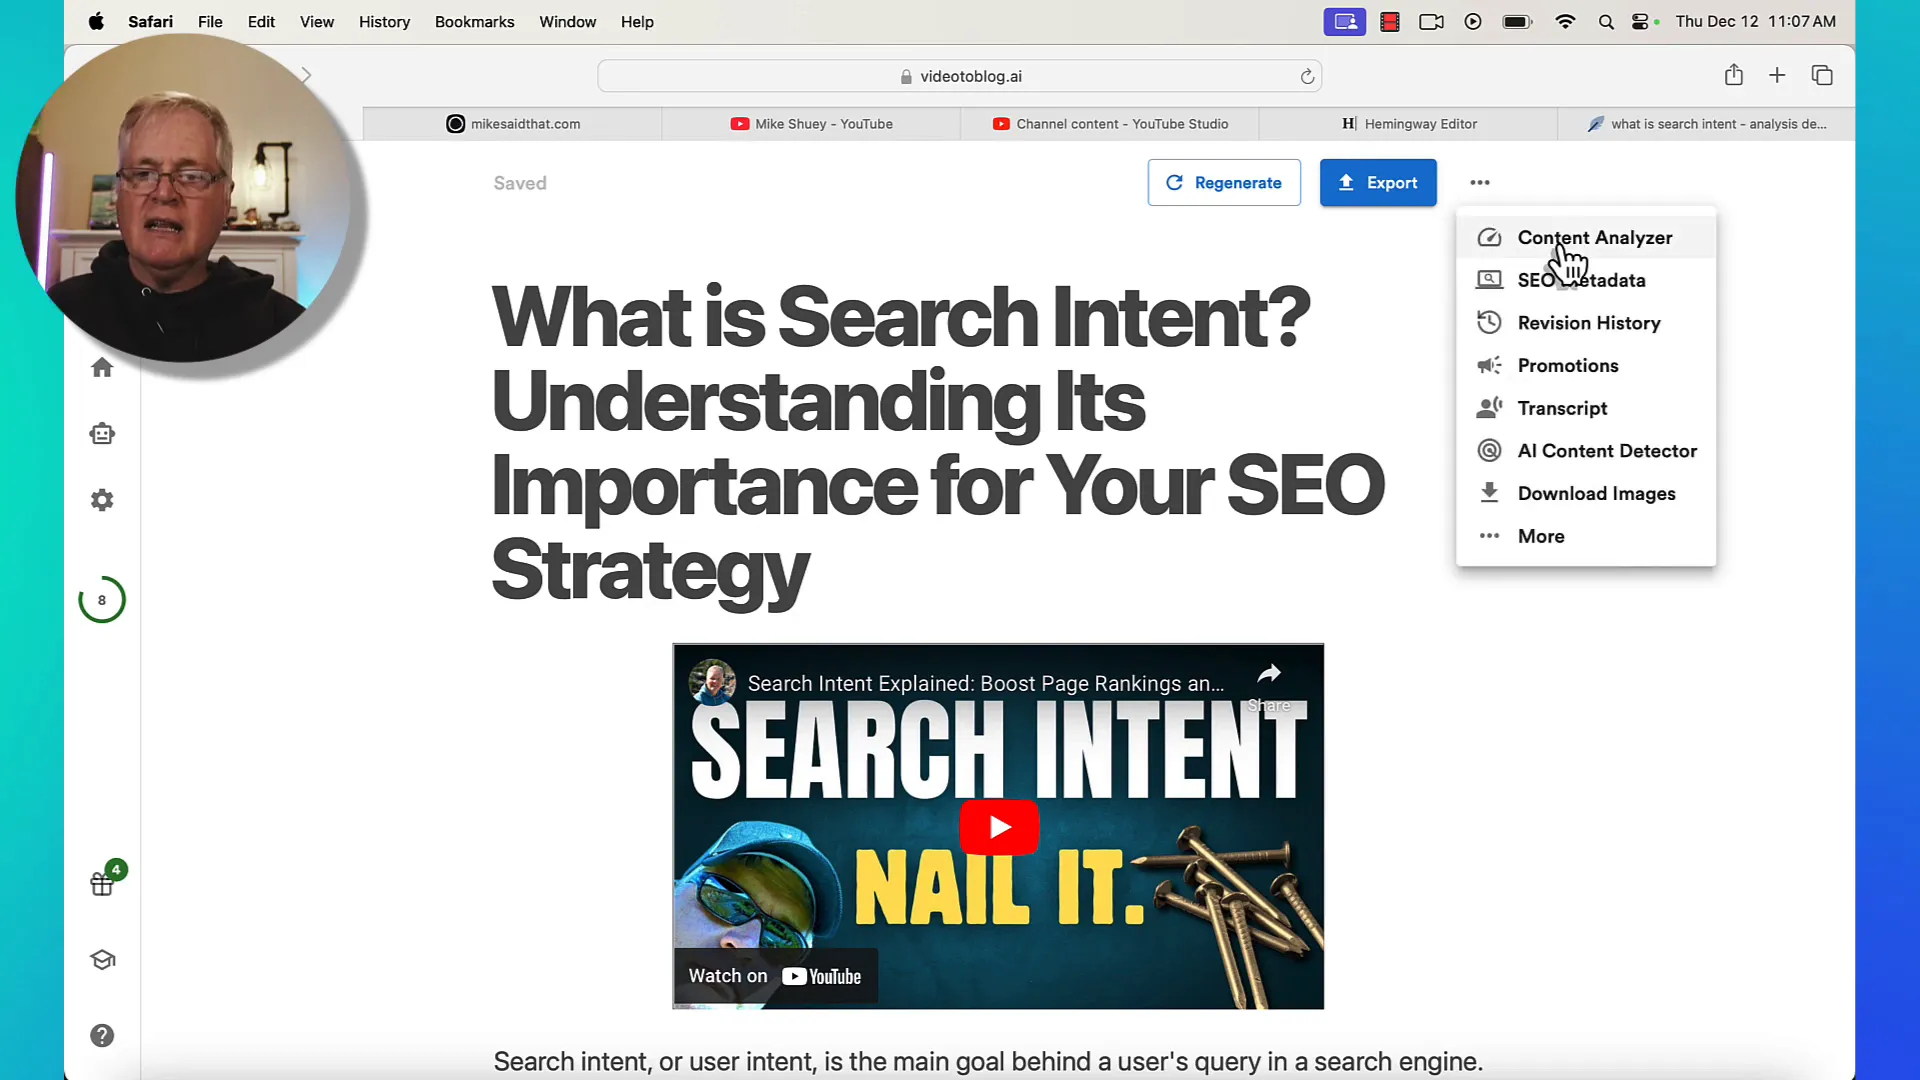
Video to Blog includes a content analyzer that evaluates your blog post's readability and SEO. This tool can help you identify areas for improvement, such as adjusting sentence length or keyword density. I often use this feature to ensure my posts meet quality standards.
Fine-Tuning SEO Elements
Another important aspect the Content Analyzer checks is keyword density. It’s recommended to keep your primary keyword density between one and five percent. If I find my keyword is underrepresented, I’ll sprinkle it naturally throughout the blog. This helps with search engine optimization and ensures my post is discoverable.
Additionally, I review the meta description and slug generated by the tool. If my primary keyword isn’t included, I edit these to align with my SEO strategy. This extra step can significantly impact how well my blog ranks in search results.
SEO Optimization with Neuronwriter
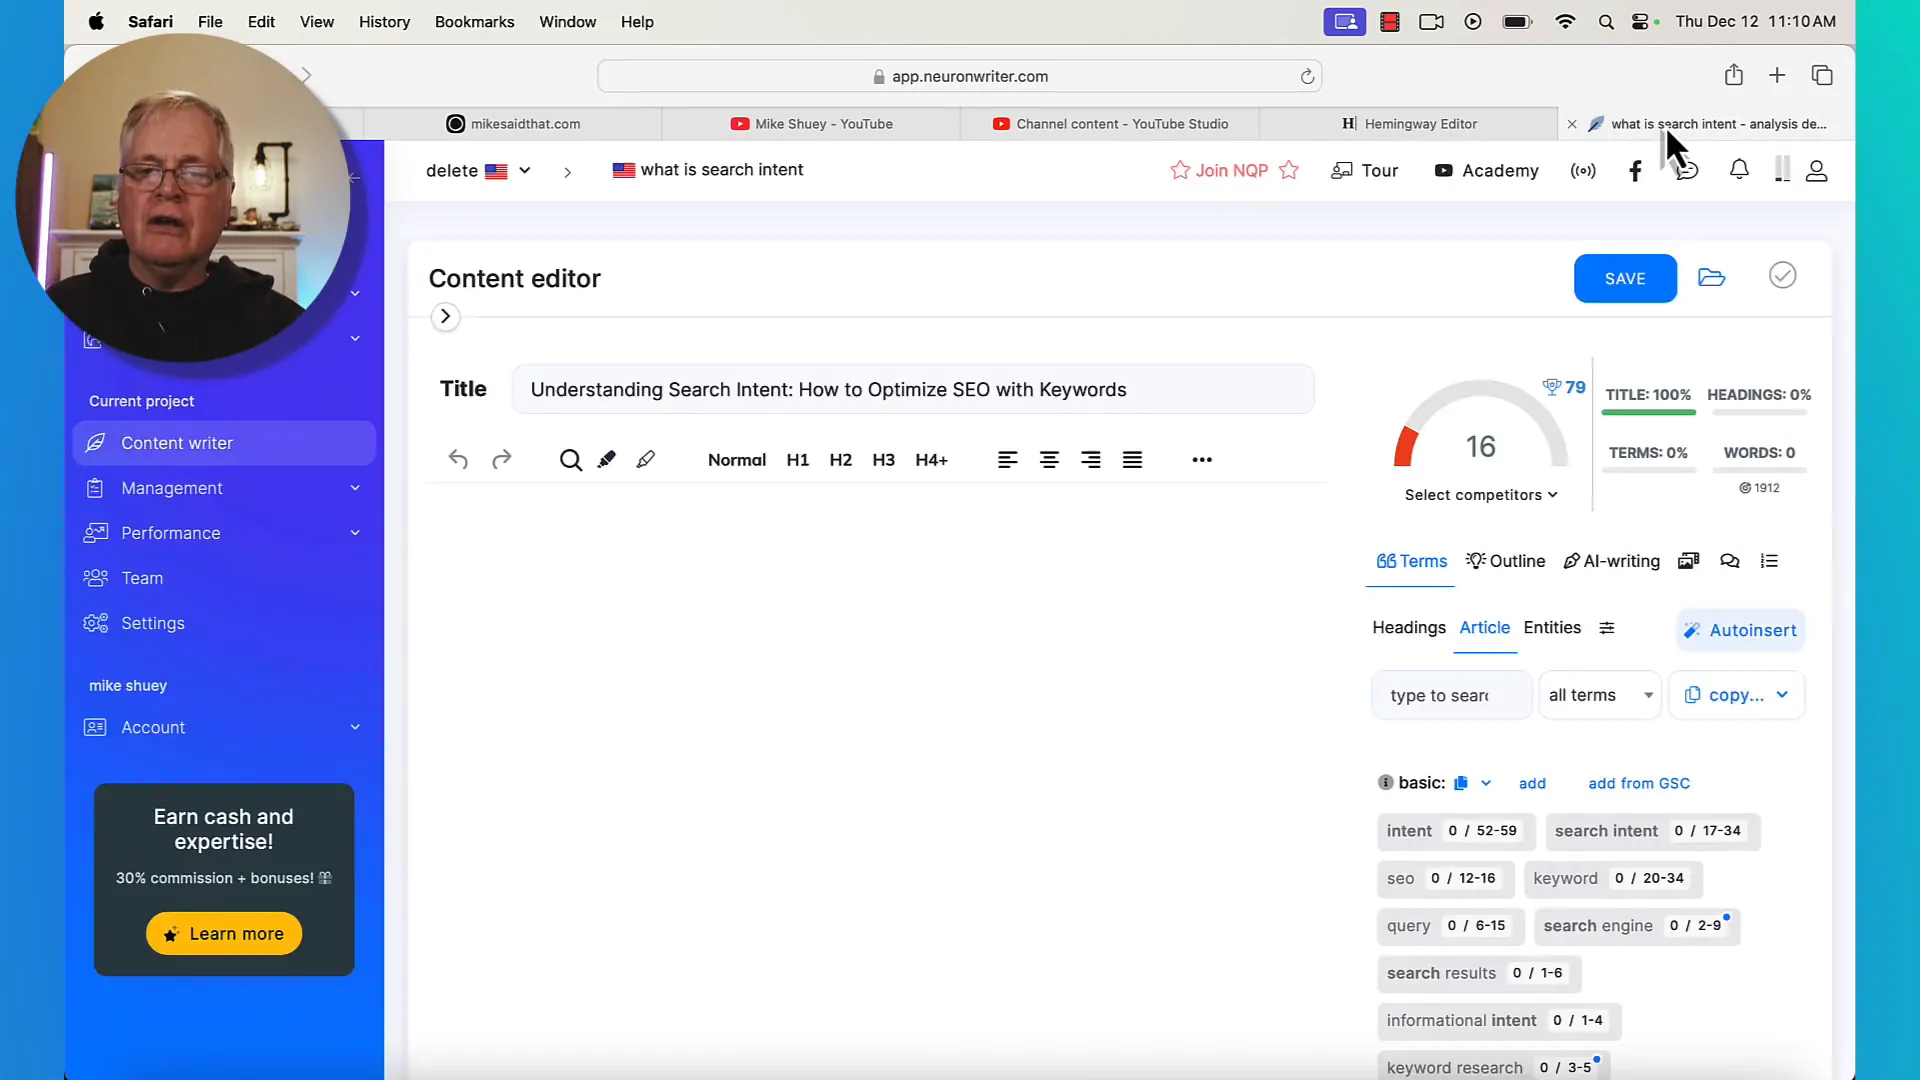
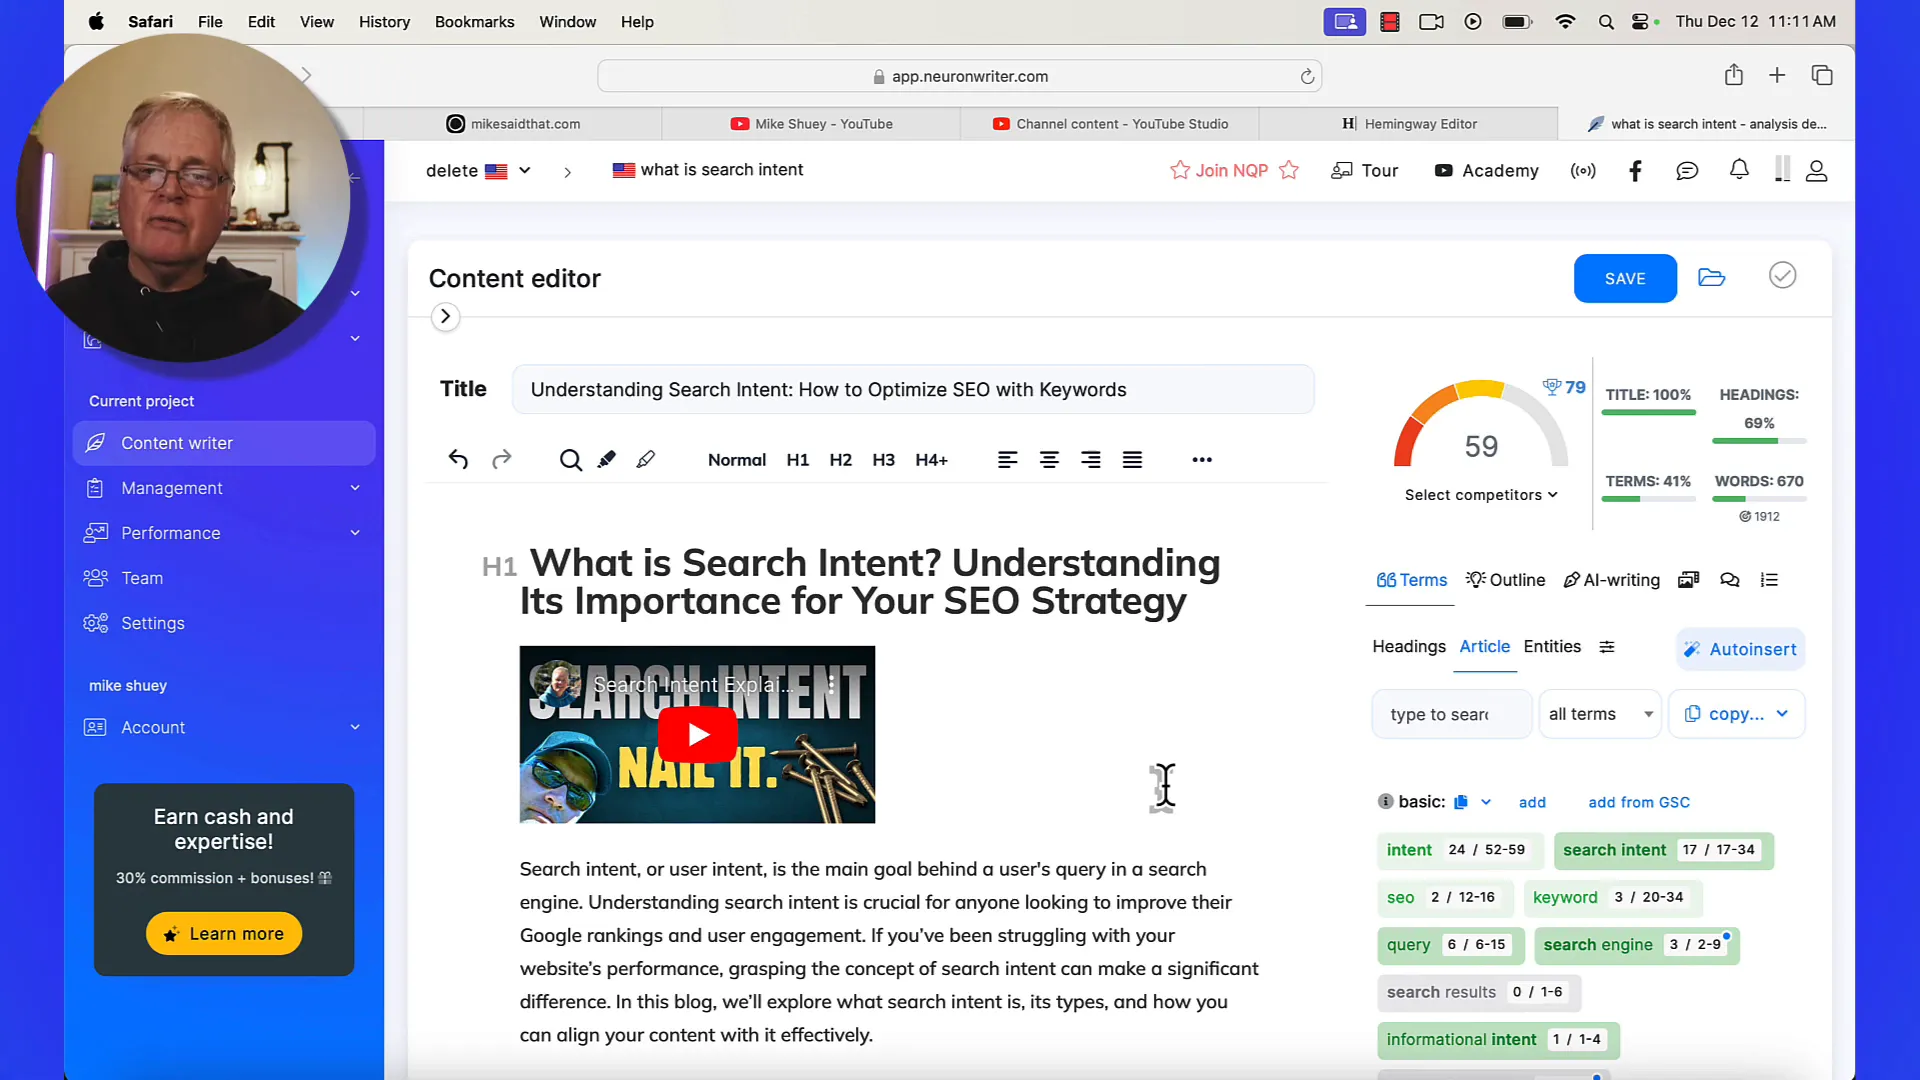
Once I've polished my blog post with the Content Analyzer, I take it a step further by using Neuronwriter for SEO optimization. This tool allows me to analyze how well-optimized my content is compared to top competitors in my niche.
By pasting my AI-generated content into Neuronwriter, I can see its optimization score. If it’s lower than I’d like, I can identify specific areas for improvement. This might include adding related terms or enhancing the content's depth.
Leveraging Competitive Insights
Neuronwriter provides insights based on what’s currently ranking well in search engines. If I notice a keyword that competitors are using effectively, I’ll incorporate it into my own content. This strategy helps boost my blog's visibility and increases its chances of ranking higher.
Moreover, I can analyze the content structure to see if I'm missing important elements, like subheadings or lists, which can enhance user experience. By following these insights, I can fine-tune my content to align with best practices.
Creating FAQs and Additional Content
After optimizing my blog post, I often find it beneficial to add a FAQ section. This not only enhances user engagement but also helps with SEO. Neuronwriter makes this process seamless by suggesting unused terms from my content that can form relevant questions.
This FAQ section serves a dual purpose: it addresses common queries that readers might have while also incorporating additional keywords that can attract search traffic. Plus, it adds value to my blog, making it a more comprehensive resource.
Pricing Plans for Video to Blog
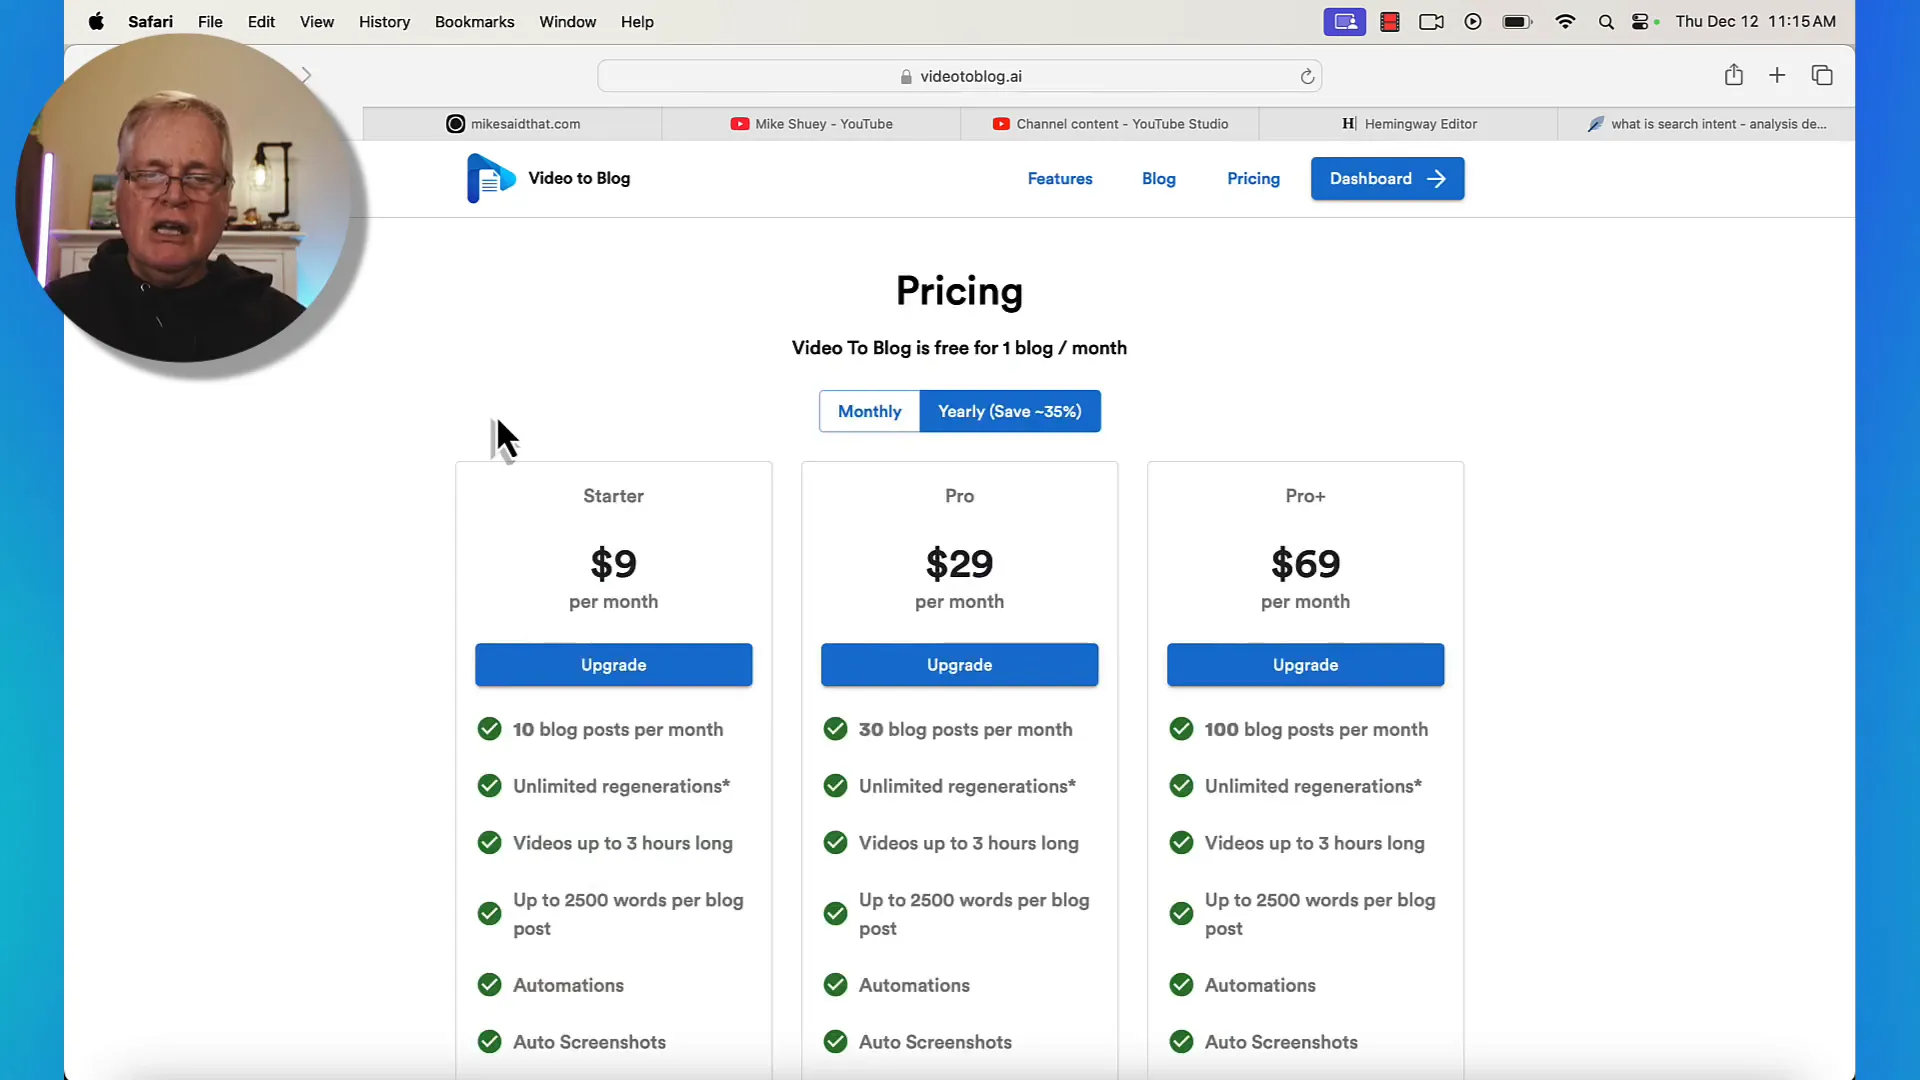
When it comes to choosing a plan for Video to Blog, you have options that cater to different content creation needs. If you’re just starting out, the starter plan is perfect for creators like me who might publish one or two videos a week.
Ready to easily turn YouTube videos into blog posts?
Get Video to Blog today! (affiliate link)
The pricing structure is straightforward. For just nine dollars a month, you get ten blog posts. This is an incredible deal considering the time and effort saved by utilizing the tool. Plus, if you opt for the annual plan, you save 35% compared to the monthly plan.
Understanding the Plans
- Starter Plan: Perfect for small creators with limited content needs, offering 10 blog posts per month at $9/month if billed annually.
- Pro Plan: For those who need more, providing 30 blog posts per month at a higher tier.
- Pro Plus Plan: Offers the most flexibility with 100 blog posts per month, ideal for larger content teams.
Conclusion: Why You Should Use Video to Blog
In conclusion, using Video to Blog has transformed how I repurpose content. With its user-friendly interface and powerful features, I can turn my videos into engaging blog posts in no time. The ability to add visuals, optimize for SEO, and analyze content quality makes it an invaluable tool for any content creator.
Not only does it save me time, but it also enhances my online presence and boosts my search engine rankings. If you're a content creator without a blog, I highly recommend giving Video to Blog a try. It’s a game-changer for reaching a wider audience and maximizing your content's potential.
For more tips on maintaining a successful blog, check out my post on Blog Maintenance. You’ll find insights on keeping your site fresh and engaging, which complements the strategies discussed here.

